Take your drone photography to another level with a DJI Mini 2 and this guide! Discover how to take better photos with these tips (plan, fly and edit)
If I could choose one superpower, I would choose to be able to fly. Or at least this was before I started using a DJI Mini 2 for photography. This little drone (and any from the DJI family) is a game-changer for anyone interested in getting their photography to another level. Easy to fly, it comes with a relatively good camera, that mixed with a bit of creativity can lead to amazing photos.
Thinking about getting a drone?
How to get started with drone photography: a step by step guide here
Thanks to its size and weight (<249gr) a DJI Mini 2 is very easy to carry, fly and store. Travelling with it is incredibly simple, and it takes literally 2 minutes to be ready to surf the air.
However, taking photos with a drone is completely different from taking photos with a camera. While some rules apply, things change when you are up there. I can’t count how many times I thought I was taking an amazing photo when I was just snapping random shots.
Looking for a way to improve your photography skills?
Explore 20+ articles on how to become a better photographer here
After some time flying, though, I feel a bit more proficient with the drone, especially in the photo area. These are the best tips for drone photography with a DJI Mini 2 (or any drone you own, to be honest).
Learn how to fly your DJI Mini 2
Flying drones is incredibly easy. If you like video games, it will feel like one. Otherwise, it just requires learning how to use a joystick. however, despite being easy, it takes time to really understand how a drone reacts in different situations. Wind, rain, cold, fog,… these are just some of the conditions that can greatly affect your photography session with a DJI Mini 2.
Take your time to learn how to manoeuvre the drone, how the battery works, and the limitations (legal and technical) of owning this flying camera. For example, it took me a few almost crashes to understand that there are very heavy wind currents at canyons, even if you don’t feel them from your position.
Before going on photography missions with your drone, make sure to feel comfortable and safe flying it. It is a real game-changer. Once flying feels normal to you, it is time to start thinking about taking photos. If you are too anxious or don’t know how to fly your drone, you will be either nervous and worried about what can happen to your drone, or not capable of putting it in the optimal conditions to take amazing photos.

Shot your photos in RAW
Drones do not have the best cameras in the market. In fact, even an entry-level DSLR or reflex have larger and better sensors. This means that cropping, rescaling or doing other post-processing tricks will result in a decrease in the overall quality of the image.
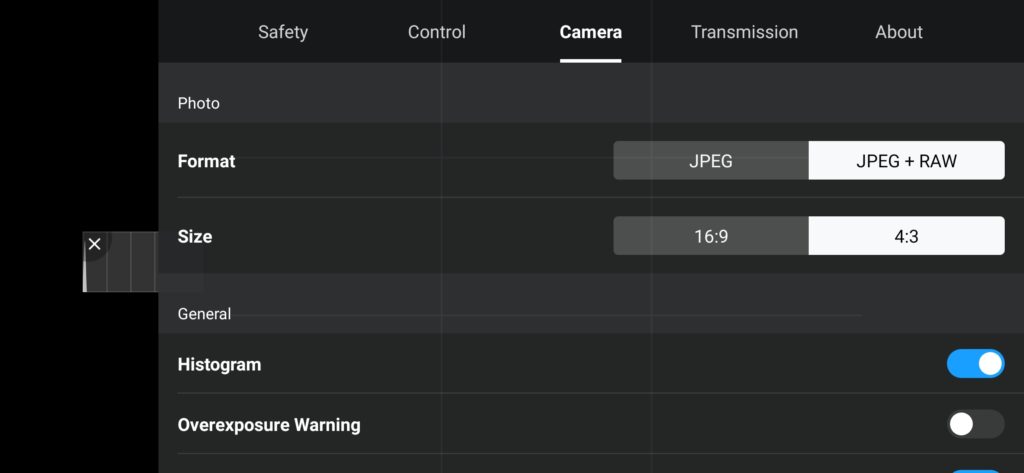
One way to make sure that you are using the drone camera at its fullest is to shoot in RAW. Unfortunately, the DJI Mini 2 does not have the ability to take your photos only in RAW. Instead, choose the JPEG + RAW option in the settings menu.
You will get the two versions for each photo, which can be a bit annoying in terms of storage. However, remember that due to the limited sensor size, the RAW files will not be that large. The jpeg files are usually 5-6 MB and the RAW ones 23MB.
Adjust the sensor cropping
This is a tip that a friend of mine gave me, and that has been so useful. By default, the DJI Mini 2 takes photos in 16:9. Unless you really want to take your photos in such a landscape mode, choose the 4:3. You will be maximizing the sensor size, and the quality of the final photo will increase.
Avoid the automatic mode
If you are still taking photos using automatic settings, you are missing some great photos. The DJI Mini2 comes with a manual photography mode, and you should be using it.
First of all, when flying you will find yourself in many situations where either the sky or the ground will be underexposed or overexposed. I discuss how to avoid it in the next item, but unless you know how to take photos in manual mode, it will be useless.
When I started using the drone I tried the automatic settings, and I found out that the ISO value was usually set at very high levels. Again, due to the size of the sensor, you want to avoid shooting at high ISO, or you will end up with lots of noise in your photos.
In the case that you don’t know how to use a camera in manual settings, I would recommend learning it before flying. You can even connect your drone and test the camera without being in the air. Or even better, use a camera or the manual mode of your smartphone. When taking photos with a drone the only thing you have to worry about is composing a perfect photo.
In a nutshell, set your ISO at the lowest possible level, and try to find a shutter speed that gets a crispy image. Due to the stabilization of the drone, even half a second exposure can lead to good results. Of course, in non-windy conditions.
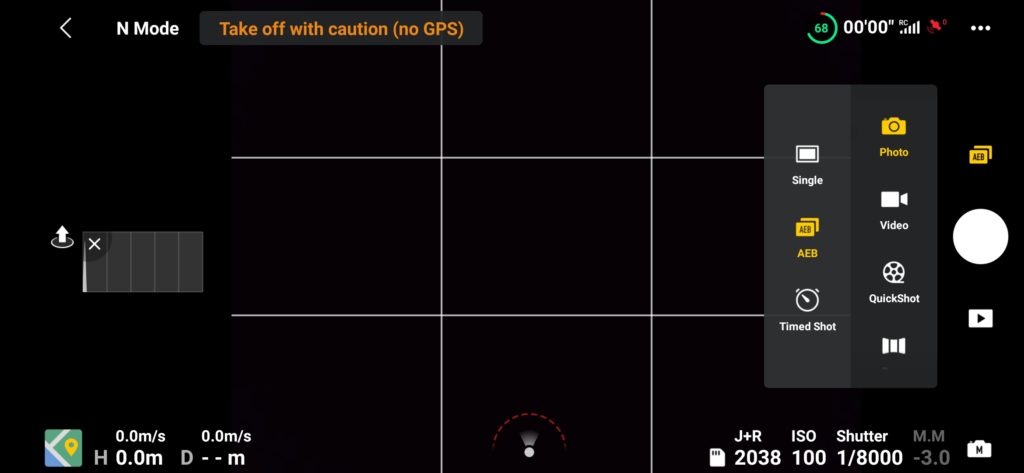
Use bracketing
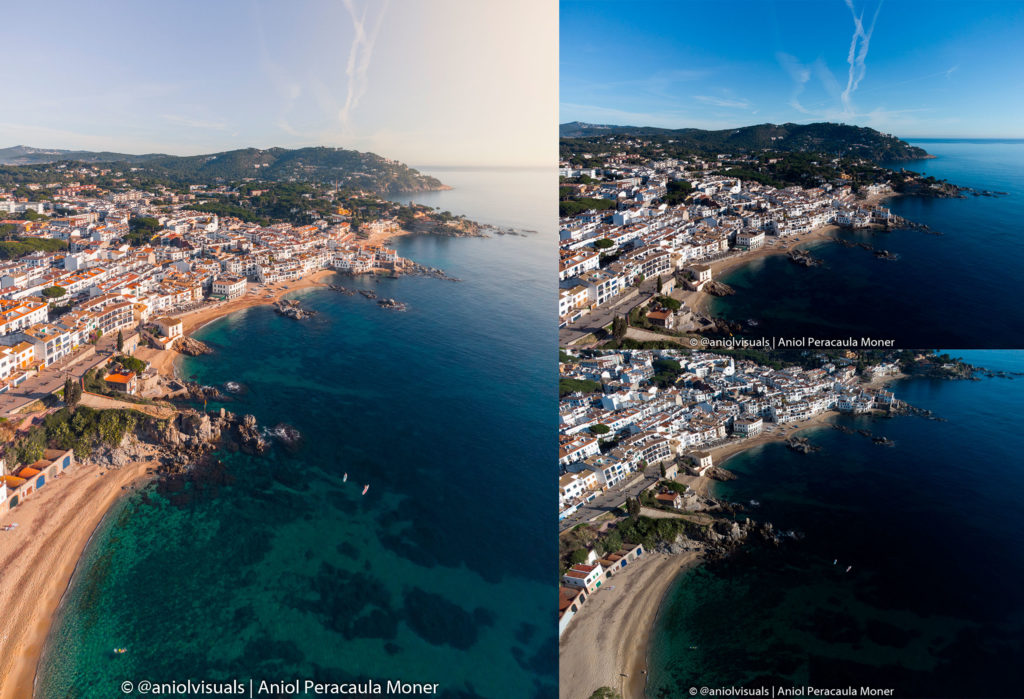
I believe this is the key to taking perfectly exposed drone photos. The DJI Mini 2 has a bracketing option. This means that the drone will take 3 photos when you take one. The one you see on the screen and 2 more, one slightly underexposed and one slightly overexposed.
This is very useful because these three images can be merged using a post-processing software light Photoshop or Lightroom into a single image, and HDR one.
HDR is key in drone photography. If you take a single shot, the image will be either underexposed on the ground or overexposed on the sky, excepting very specific conditions (mostly cloudy days). Thus, being able to take the best of highlights and shadows and mix them into a single image (HDR), compensates for this effect.
To activate the bracketing shot on your DJI Mini 2, had to the lateral menu in photography mode, and select the icon shown in the image below. You can certainly do it in the sky. However, I recommend doing it just after taking off (or just having it as default). The fewer things you need to change while flying, the better.
Create your own vertical shots
One of the limitations that the Mavic DJI 2 has when it comes to photography is that it does NOT take vertical photos. Yet, most social media platforms, such as Instagram, are mostly created to share vertical content.
If the sensors of the drone cameras were comparable to a mid-range DSLR or reflex, cropping would be the solution. However, as has been highlighted in previous tips this is not the case with the DJI Mini 2. Thus, the only way to take vertical photos would be when the camera is pointing directly down. But do not worry, there is a way to create beautiful vertical photos no matter the composition.
The only thing you will need is software capable of merging multiple photos into a single one. Photoshop or Lightroom are two of the best ones for this purpose.
How to take a vertical photography with a DJI Mini 2
It is really simple. To identify great vertical photos, you will be using the gimbal, moving it up and down to see the whole scene. Once the drone is in the right position, stop moving. It is very important not to change the position of the drone.
Then, take the first photo, one that, for example, shows the sky. move the gimbal a bit, so it shows some of the landscape that couldn’t be seen in the first photo, and then take the second image. Keep doing this until you have multiple photos that afterwards you will merge using the panorama function of programs such as Lightroom.
PRO TIP: Mix this trick with the previous one, and use bracketing when taking a vertical photo. It will help compensate for the difference of light between the sky and the ground!
Don’t go too high
I bet the first time you fly a drone you will go as high as possible. I did the same. Looking at the world from such a distance is impressive. However, photos from 120 meters above the ground are not always the best. There are a couple of reasons why you should not go as high as legally possible.
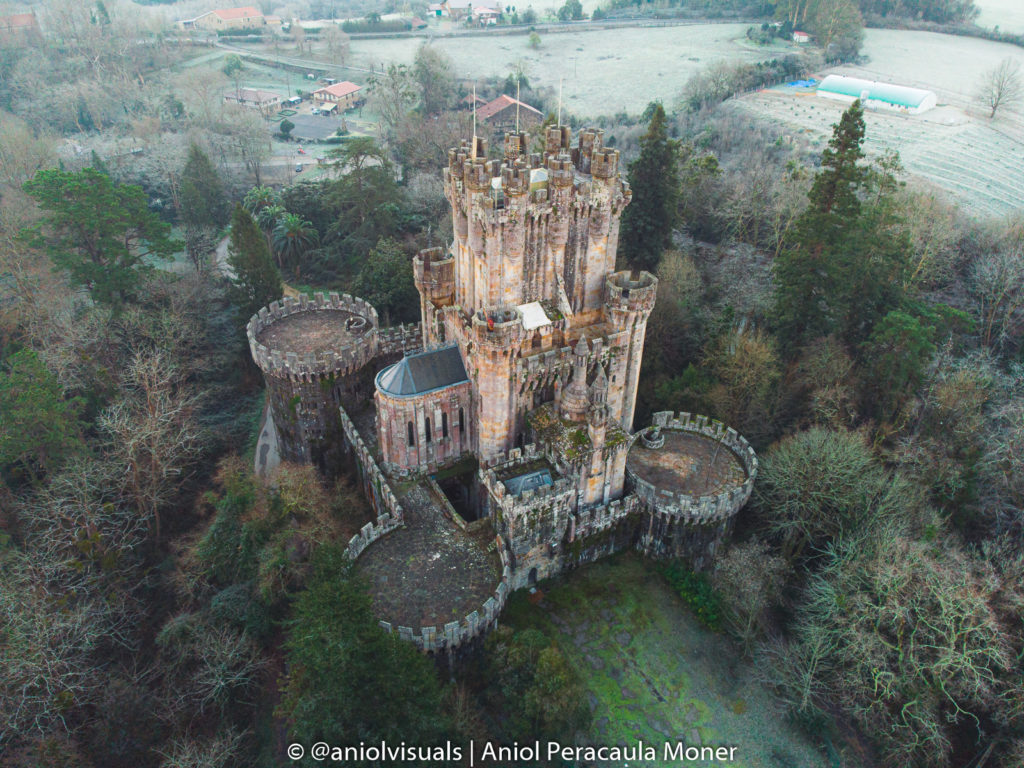
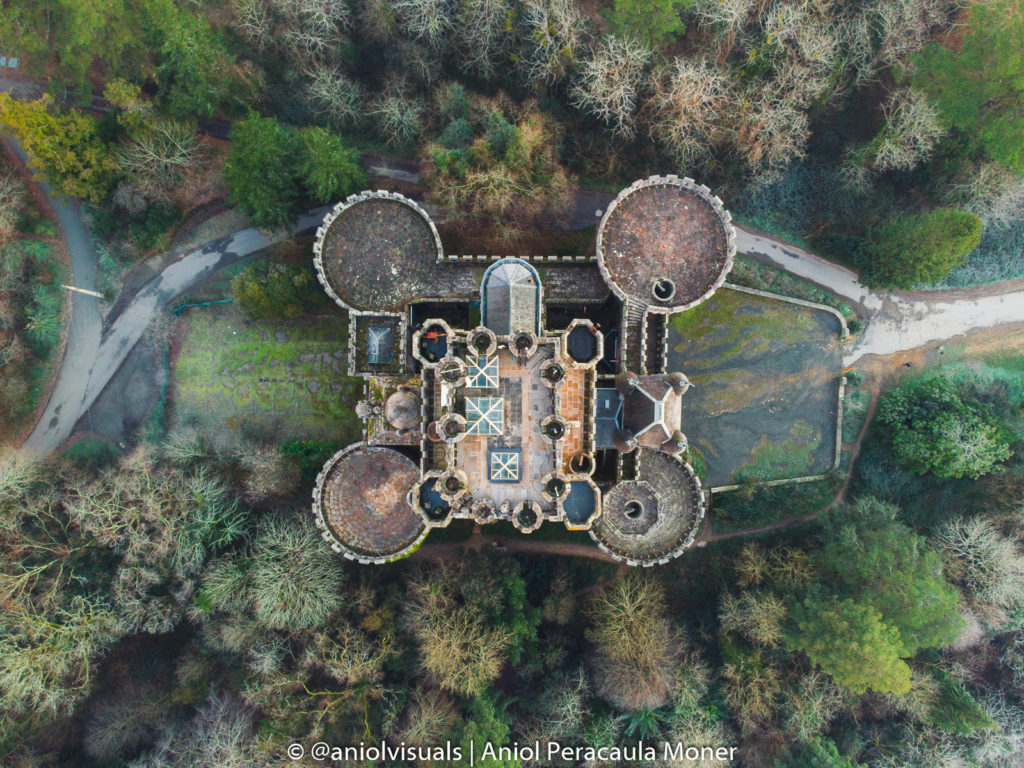
Firstly, image quality. Yes, AGAIN. But if you have a photo taken from so far away, the detail in the final image will not be that good. It is a 12MP camera, not a 48MP. Some situations may require flying very high, but some do not. Imagine you want to take photos of a castle. Of course, the castle has to be in the frame, but why get 200mts away and 120 meters high? You won’t be able to see the castle in the final image!
Secondly, drone photography is all about perspective. When you see things from a different point of view (more about this coming later), you take unique photos. Just flying 10m from the ground usually give a better perspective of the scene. Maybe a light cable is not in the middle of the composition. Or some element that was blocking your view disappears.
Height really influences the photo. If you are used to taking photos, you know how different a photo looks taken from ground level or at 2m. Imagine this but with 120mts. Try to fight the desire to fly as high as possible and make sure that you are at the right height for your photo.
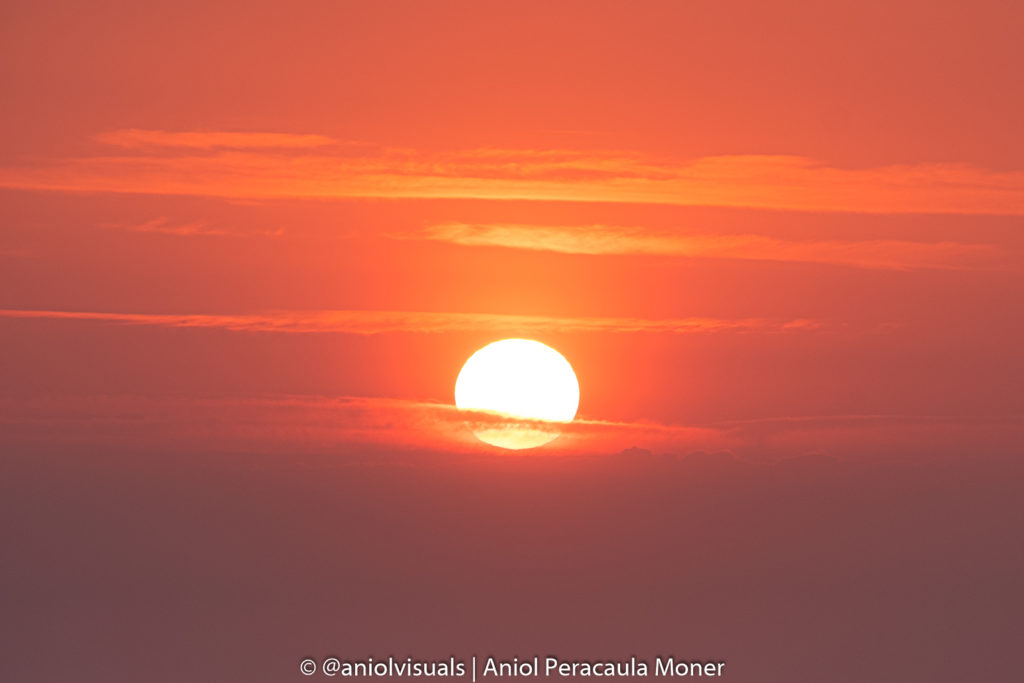
Pursue the best light conditions
Taking photos with a drone is not much different than taking photos with a camera when it comes to conditions. Golden hour and blue hour are the best moments to take photos. Night photography is a bit more difficult, as there are legal restrictions and long exposures with drones are not that good.
For all the photographers out there, this means that sometimes you will need to make a hard decision: camera or drone. I have tried it, and it is not feasible. If you are taking your sunset photos with a drone, commit to it. Oh, and check your battery!
Best ND Filters for DJI Mini 2 photography
However, if you still want to take photos with your DJI Mini2 (or any drone) during the daytime, consider buying a set of ND filters. They really make the difference, both in image and video, and they come at not so expensive prices.
Here you have a few recommendations, as well as the ones I use myself (non-affiliate links). Before spending your money though, make sure you will use them 🙂
- Skyreat ND filters for DJI mini 2
- PGYTech ND filters for DJI mini 2
- Freewell ND filters for DJI mini 2
- Globact ND filters for DJI mini 2
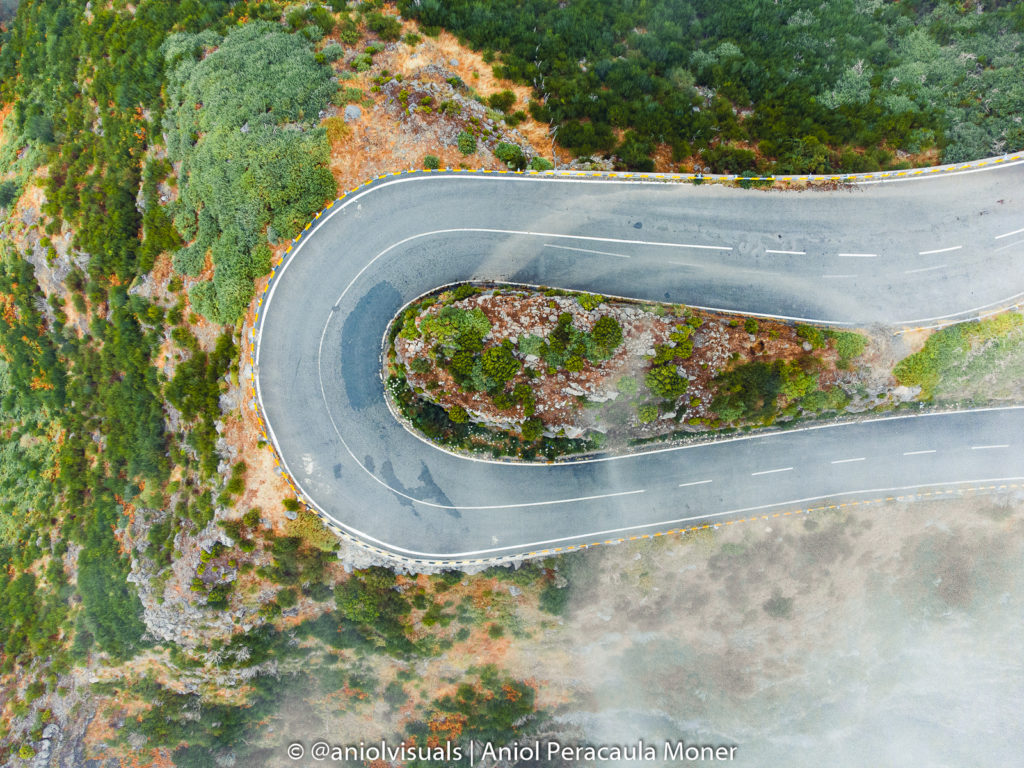
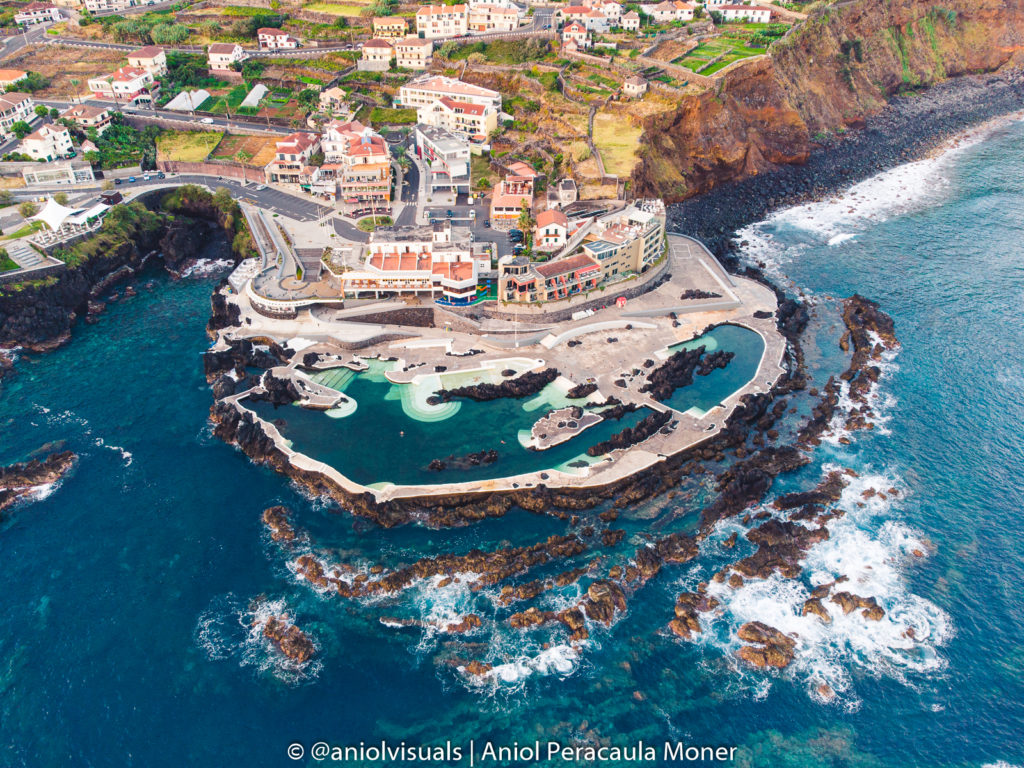
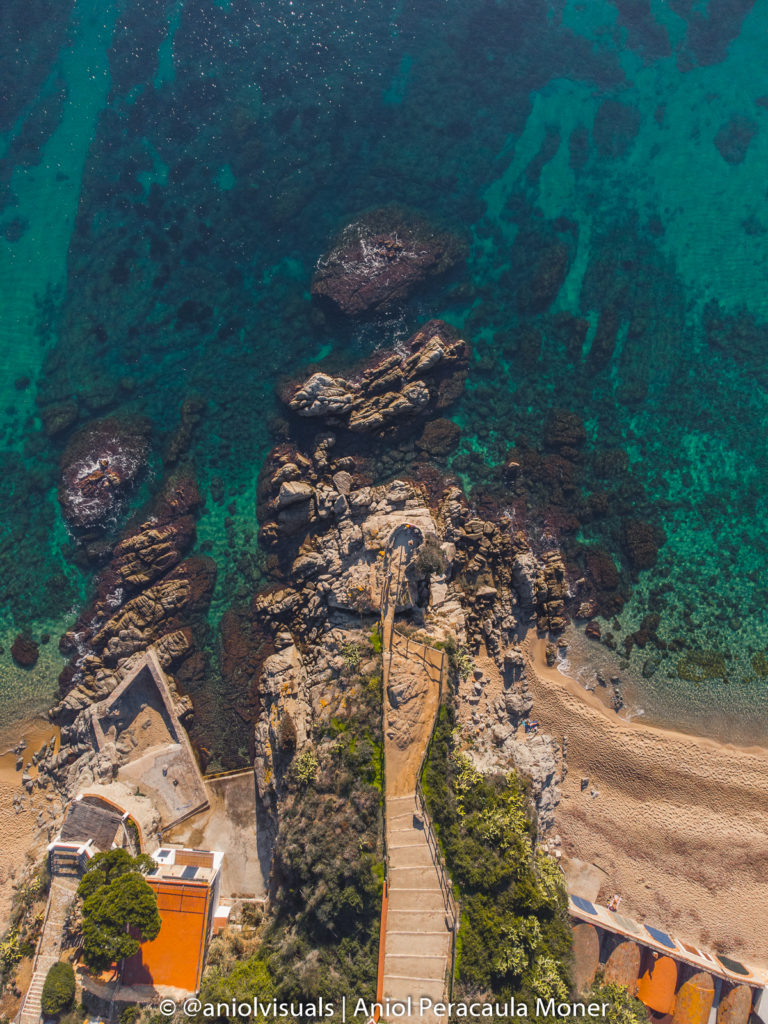
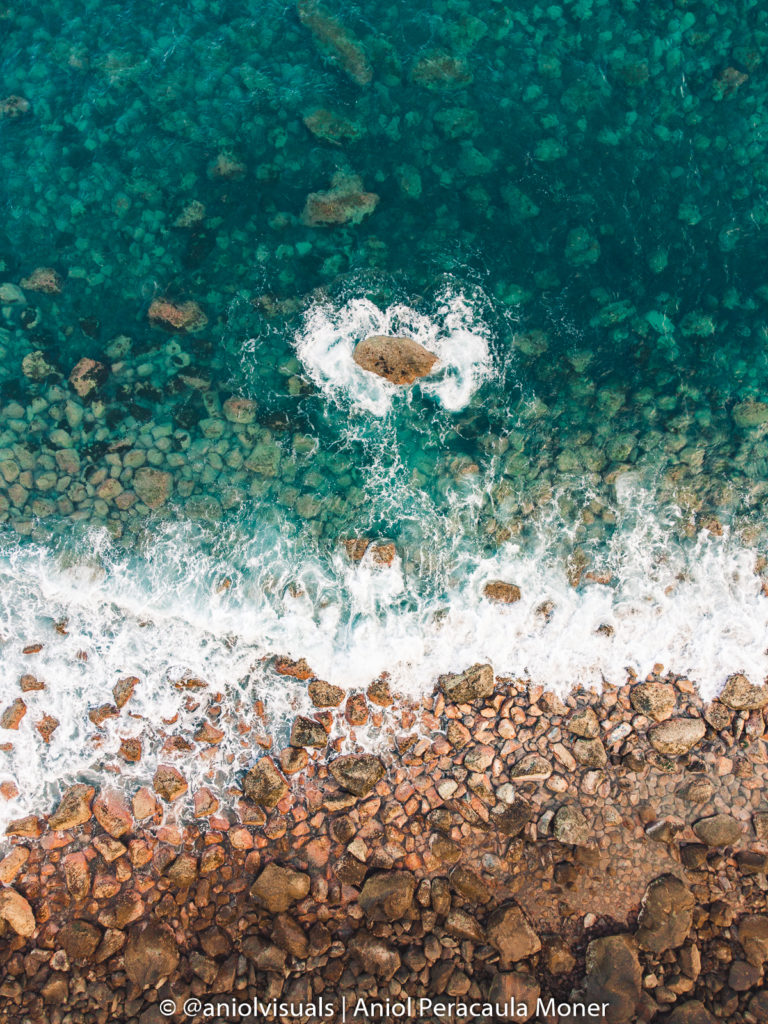
Look down
Drone photos are amazing because they show the world from a different perspective. You get to see places that look normal from a bird’s eye point. One of the easiest ways to get an amazing shot with your drone is to look down. Mixed with the don’t go too high can let you take some unique photos.
Roads, buildings, forests,… we are not that used to seeing it from above, and it creates this wow-effect that drone photos have. It will take some time to find the best spots, but make sure to always look for patterns, different shapes, or objects that look different from above. Even simple things like the shade of a lonely tree at golden hour can be a worthy photo. Moreover, while taking photos from above it is easier to have an evenly exposed image, as you won’t have the sky and ground in the frame.
Plan your shot
Planning is an essential part of photography, especially drone photography. There are plenty of things you should care about (see below). Again, it does help you take better photos. There are many tools and things you should consider when planning a photography session with a DJI Mini 2.
How to plan a photography session with a DJI Mini 2
First of all, you want to check the legal stuff. Unfortunately, it is not easy to find legal places to fly your drone. However, there are ways to get it out there and take nice photos or videos. Very slowly, countries are starting to get more transparent on what you can and can’t do.
There are lots of websites where you can check the legal requirements for drone photography, but I always try to go to the official pages. With a quick search of “name of country” drone legislation, you should find it.
Secondly, check the weather conditions. As stated before, they really make a difference, and you want to make sure that you will not get extreme wind gusts or rain/snow/fog.
Third, plan your compositions. There is a myriad of tools useful for this purpose. I usually check things such as Google Maps or Google Earth. The latter is perfect for really understanding what your photo will look like. Make sure to also check Instagram or other social media for locations or photos taken at a similar location.
Composition is everything
I think I said it a hundred times but composite your photos correctly. By being 20, 30, 60 or 120 meters above the ground you will not take a great photo. It has to be well-composed. In fact, it is easy to end up with a dull image if you do not give your composition a thought.
Rules of thirds still apply, leading lines are key, and thinking about all of it while flying is quite difficult. Thus, the importance of planning and learning how to fly. The height variance plays a huge role when composing. To improve your skills in this area, I recommend taking multiple photos, from different heights and comparing them afterwards.
It takes time to improve your drone photography composition game, but it is the key to impressive photos.
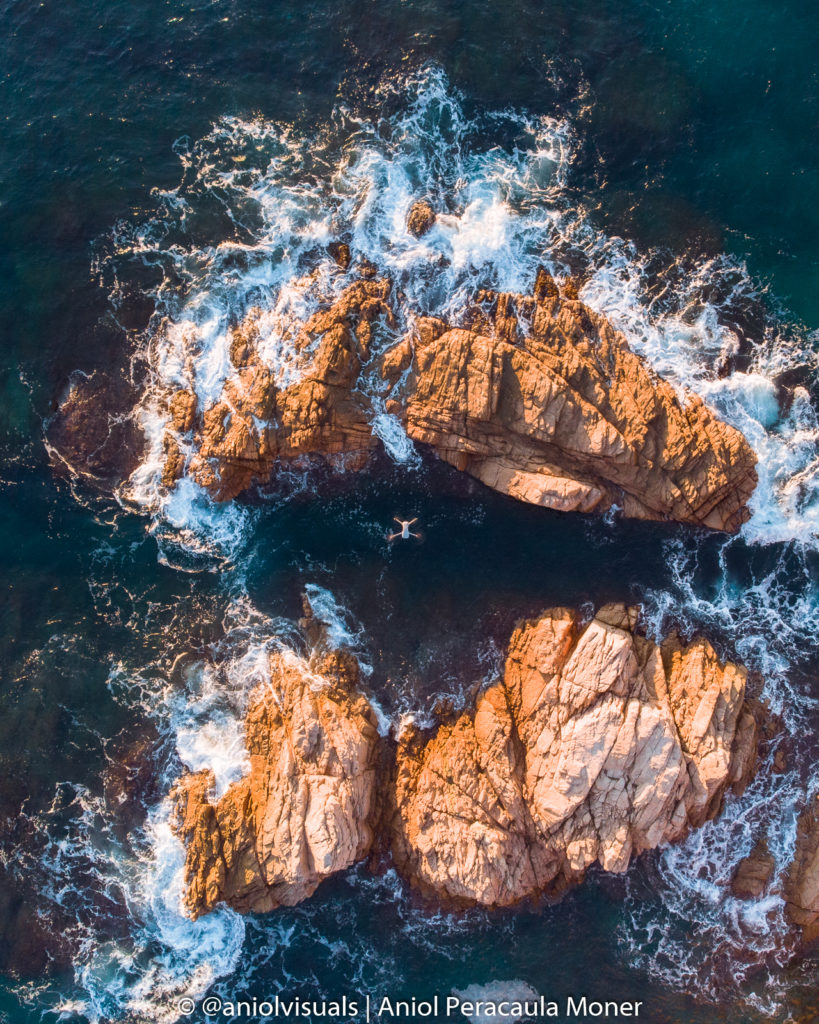
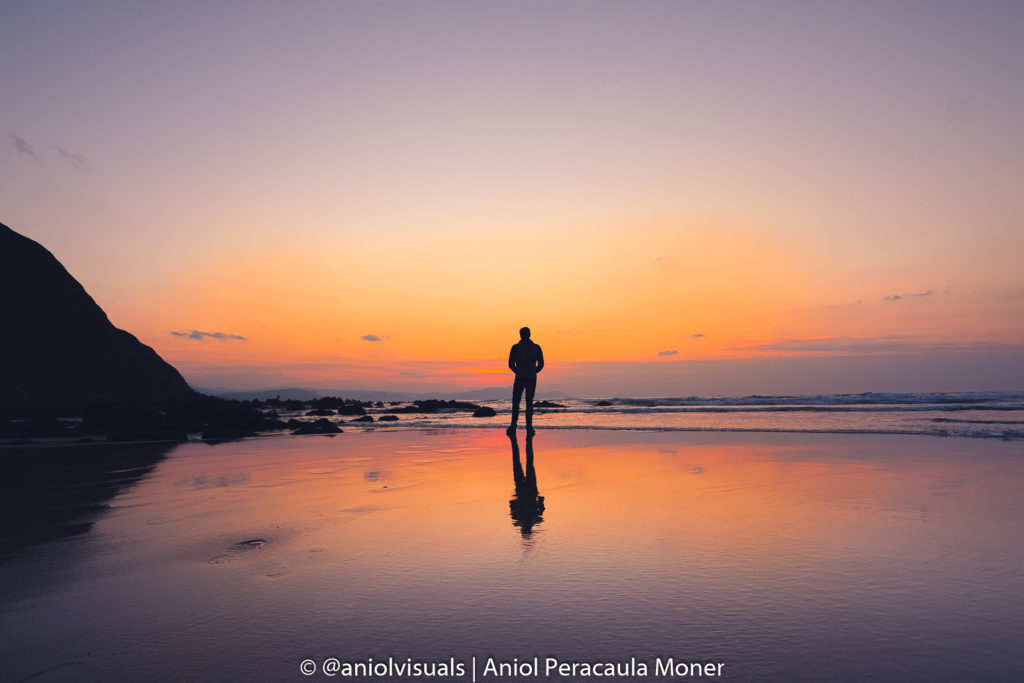
Add a human factor to your photos
One of the most specific tips I wanted to cover was adding a human factor to your photos. Being all about perspective, humans are small. It does not matter if you are at the top of a mountain, in the middle of a road… Adding a human in your photo will give scale and most likely make it even more impressive.
Edit your photos
Last but not least, edit your photos. If you are taking photos in RAW, it is so you can edit them afterwards. It will take some time to learn how to edit them. This is mostly due to having different RAW files. No matter the brand you take your photos with, each one has a specific colour tone. At least in my case, I had to adapt my workflow to the DJI Mavic 2 raw photography files.
Graduated filters are my best friend when editing drone photos, as they help direct the light and attention towards the main objects of the scene.
I hope you enjoyed this DJI Mavic 2 photography guide. If you follow the tips above, your photos will undoubtedly improve. Have fun flying your drone, and if you want to see more drone (and travel) photos, make sure to follow me on Instagram (@aniolvisuals). If you have any questions regarding this article, feel free to send me a DM or reach out through the contact form. For other inquiries, send a mail at hello@aniolvisuals.com.
Looking for a way to improve your photography skills?
Explore 20+ articles on how to become a better photographer here
10 reasons to stop posting on Instagram as a creator
Solo travel photography: 11 tips you have to know
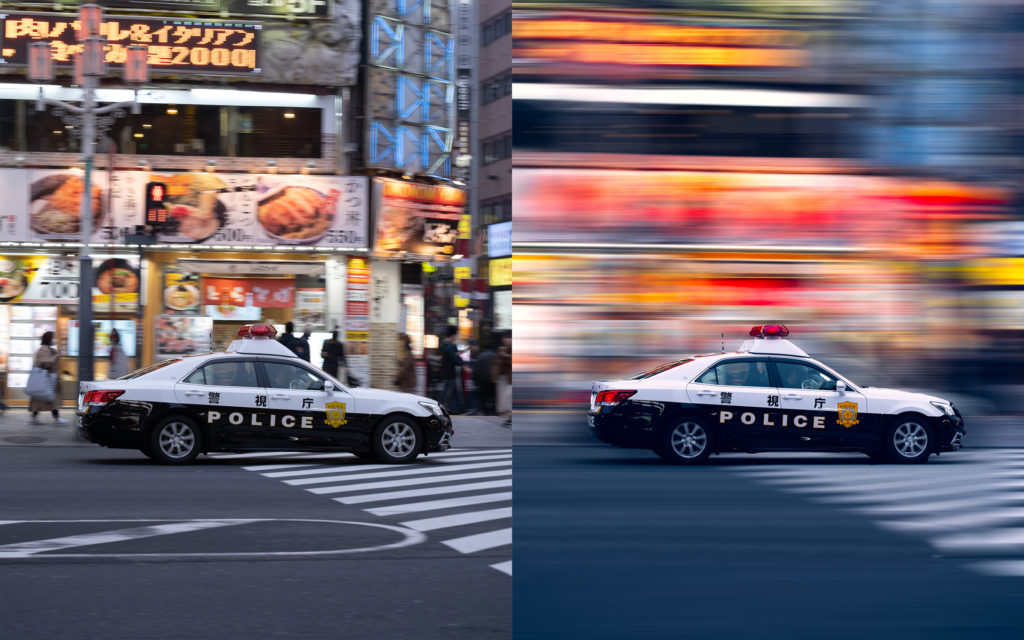
Panning photography: how to take it and how to fake it (Photoshop)
10 differences between camera and smartphone photography: an ultimate list
How to get better at smartphone photography
7 tips for amazing cloudy sunset (and sunrise) photography

How to get started with drone photography: a step-by-step guide
My best 2020 images. Part II: Japan photography
My best 2020 images. Part I: Spain photography

How to set goals that will improve your photography [2021]
How to capture motion in photography
9 amateur photography mistakes and how to avoid them
How to improve your photography skills: 10 free tips

10 apps that will help you take better landscape photos
14 things you should know about Sunset Photography

Waterfall photography: all you need to know. Gear, settings, and tips
How to take amazing photos on a cloudy day