Water is one of the most amazing and hypnotizing things to photograph. And when you find it in its natural environment, wild and powerful, like a waterfall, who doesn’t want to capture it? This is what I will be covering in this article: waterfall photography tips.
After many years of taking photos, I have encountered very different types of waterfalls. I have seen frozen waterfalls, dry waterfalls, tall waterfalls and wide waterfalls. Just as a landscape changes during the year, so do the waterfalls. But more about this later on.
If you are here it means you are looking for information on how to take photos of waterfalls. Let me be honest: I will tell you a lot of information in this post. Most of this information I have learnt it by failing. However, there is nothing more valuable and useful for taking good photos that getting out there and practising. Yet, there are some waterfall photography tips that can be useful and save you some grief when you get back home and the result is not the one you were expecting. Keep reading to learn them!
1 Gear
There are three things that I deem essential to have to get beautiful waterfall images, excluding the camera: a tripod, adequate lenses and ND filters or a polarizer (a good set of filters would be ideal). Each of the following works on specific situations, and will be handy or annoying depending on the type of photo that you are trying to take.
If you want to get the silk effect on the water, the tripod and the ND/Polarizers will be necessary. For a more in-depth discussion about the silk effect, keep reading. However, you have to know (at least roughly), the type of image that you would like to get. Most waterfalls are in difficult areas, not very accessible. Therefore, the angle, the distance from the water or the position will greatly affect the image. I (almost) always go for a wide-angle lens, a 10-24mm F4. Yet, this is my personal choice because it fits my personal style.
To summarize, in 90% of the situations, you will need a tripod, at least one lens that you feel comfortable working with, and a polarizer or an ND filter. I use both (or none), depending on the situation.
2 Settings
There are two main possible settings to be used when taking waterfall photographies, and each one will lead to a very different final image. Before deciding the settings to use, you should answer one main question: silk effect? yay or nay?
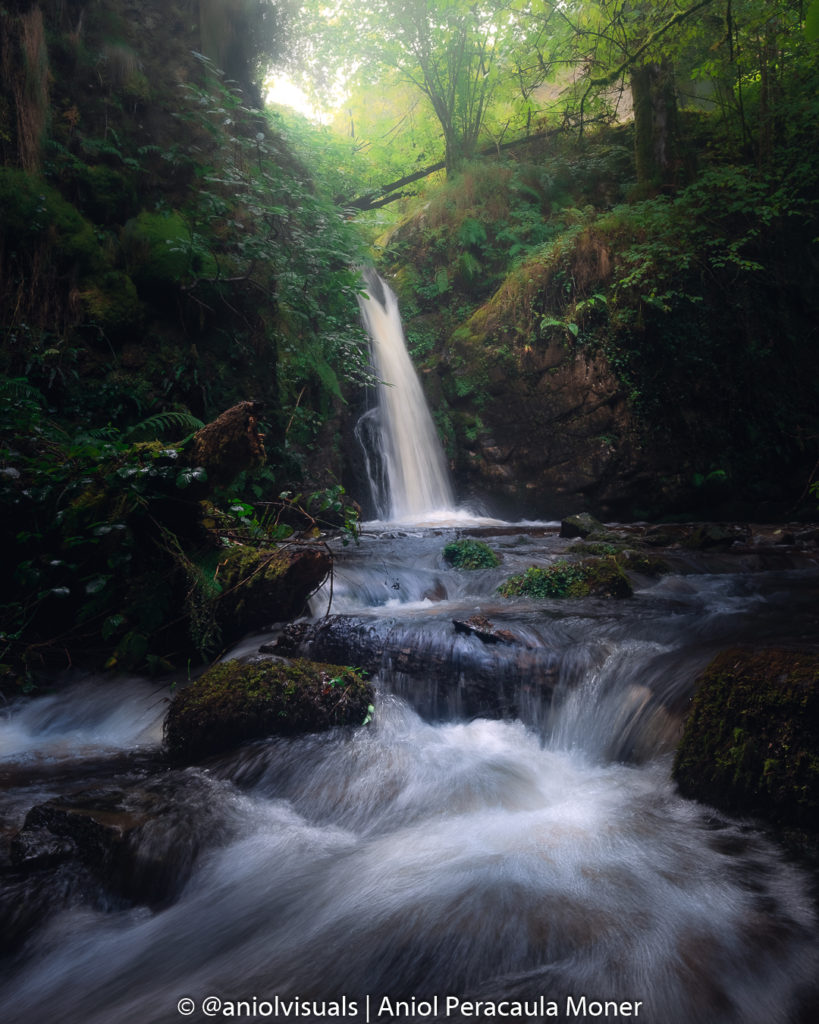
The silk effect is this (sorry) effect that some images have where the water looks smooth, like silk. This happens as a result of an exposure time that allows capturing the movement of the water. Most of the images you will see in this post have been taken looking for a silk effect, however, some of the waterfall images I am more proud of, do not have a silk effect on purpose.
If you want the silk effect present in your image, the exposure time should be of more than 1/6. Faster shutter speeds might capture it as well, but I usually get acceptable results with this exposure. Practise a bit and try different exposures (hence the need for ND filters/polarizer). You will see that longer exposure times lead to slightly different effects.
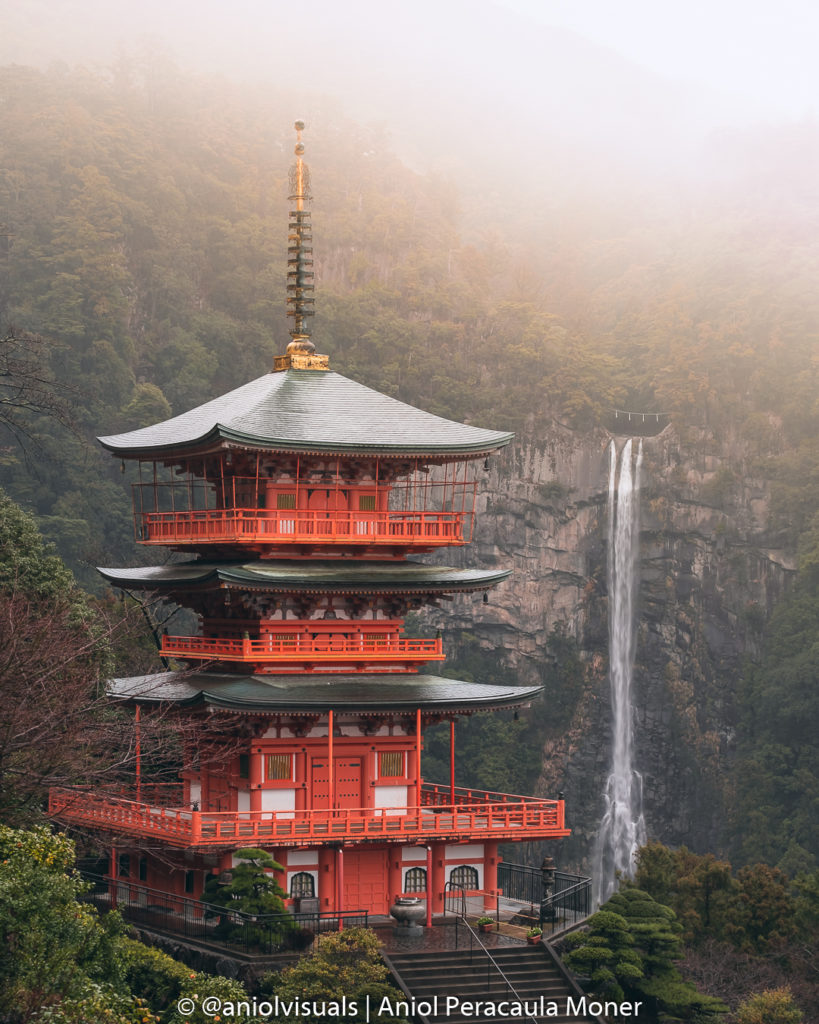
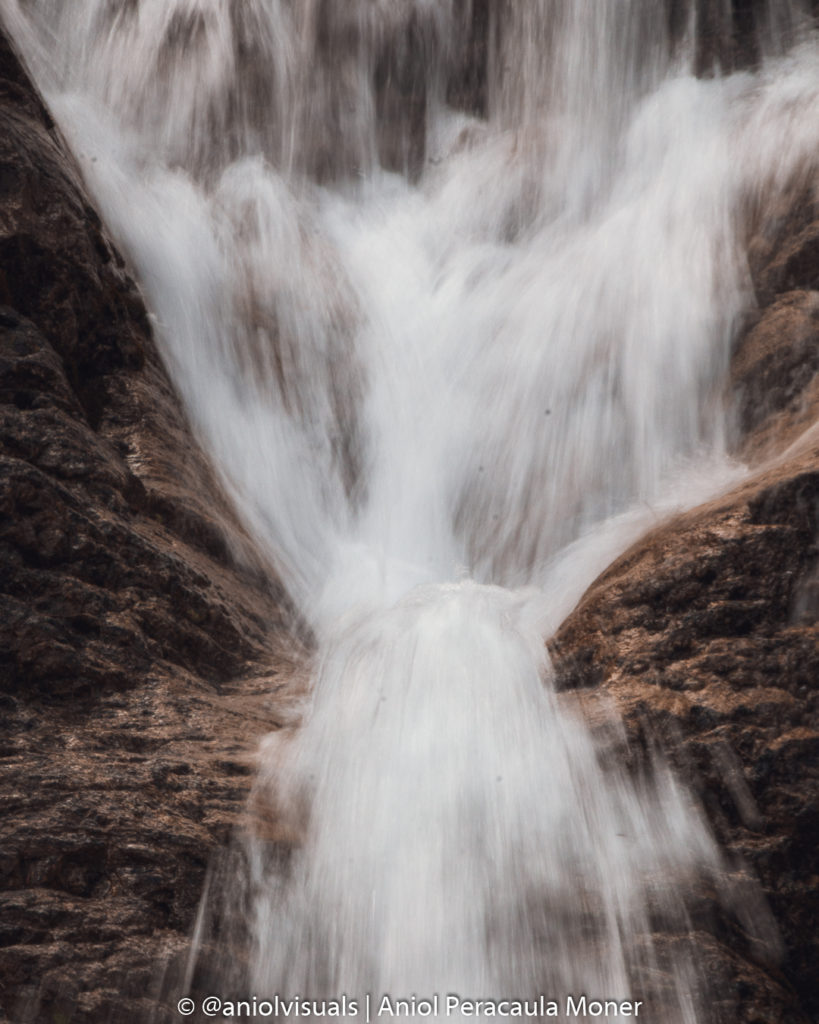
However, sometimes it is relevant to capture a static image of the water. We do not want to see the silk effect, but the shape of the water when falling. This is the case on some tall waterfalls, in places like Iceland or Indonesia, where during the free fall, the water forms awesome figures. In these cases, exposures around 1/60 tend to capture the water almost static.
As in most situations, ISO and depth of field will depend on the situation and the composure (more about composure in the following section). I tend to shot on native ISO, it makes it easier to edit the images later on, as they have more quality and less noise. If the image conditions allow it, I also shoot around F8. This is my lenses sweet spot, it is, the depth of field where I will get a better image quality. Unless the light conditions or the composure (maybe I want something to be not focused) require it, I will use F8.
Summary: the shutter speed will determine if there is silk effect, ISO should be as close as possible to native, and depth of field will depend on the situation but take the sweet spot of your lenses as the reference.

3 waterfall photography tips and composition tricks
Foreground and background
The first of the waterfall photography tips has to do with composition. As I have said (maybe) too many times, there are lots of different waterfalls. In some of them, it is just a free fall, a tall one, 50 meters of water going from point A to B. In other cases, the water flows and falls in different stages. This detail helps create completely different images. If the waterfall is, like in the first example, a free fall, sometimes taking the image of the water just falling can make the image a little too simple.
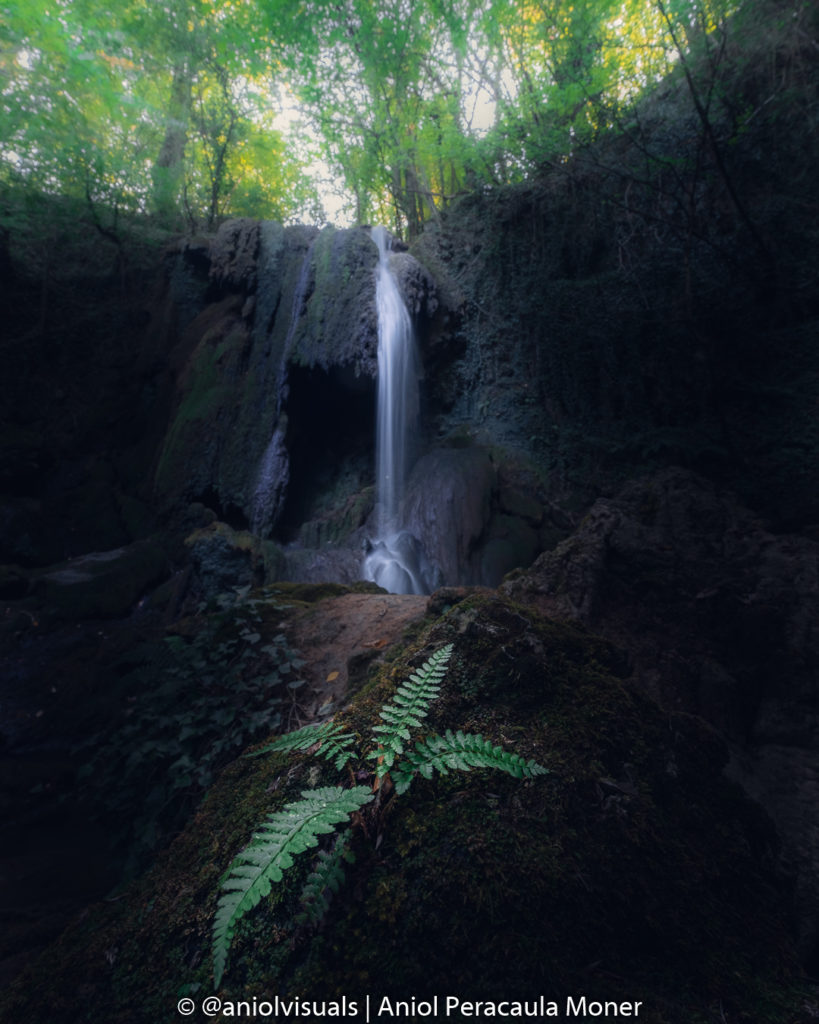
Adding a foreground element, such as a flower, a rock, a plant, or even the river that takes the water from the waterfall, can help make the image more complete. One of the problems I find constantly when taking photos at waterfalls is that I get lost with the water, and forget the surrounds. This is a huge mistake. When you see a photo of a waterfall, you don’t just look at the waterfall. Instead, the human eye analyzes the image and having depth, or elements that add to the image (without crowding it), makes the difference.
In the case of waterfalls that have different stages, if you can get close to the water (see the “your position” section below), it can be easily created a depth effect with the different levels of water. Take benefit of it, and get creative with different points of view.
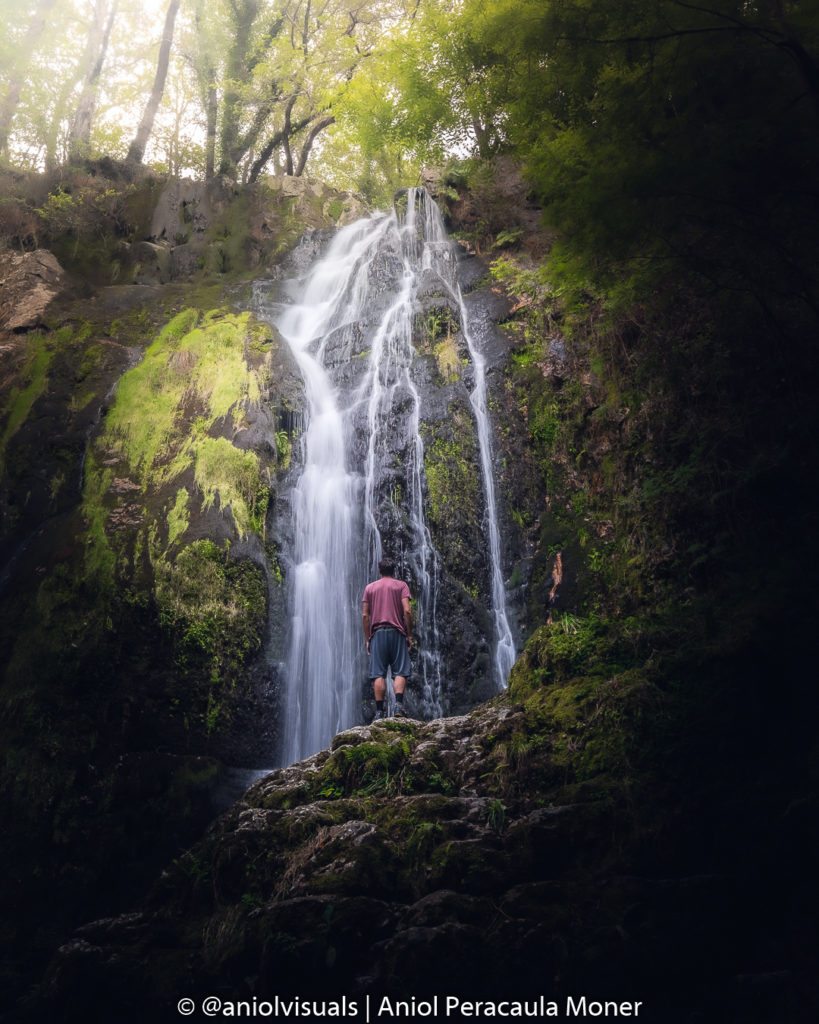
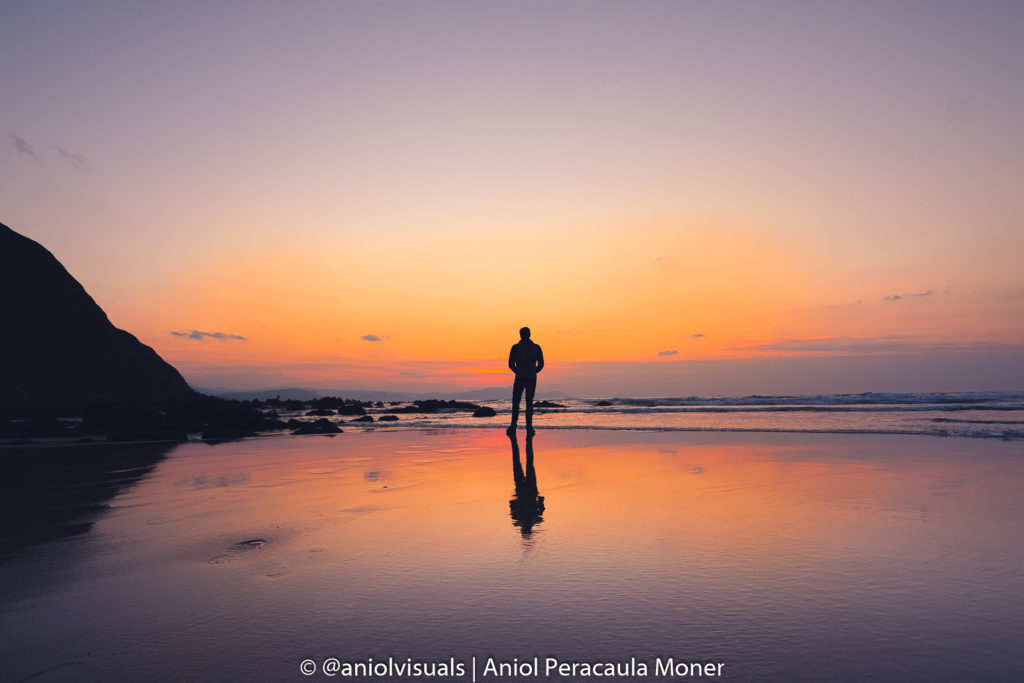
The human factor
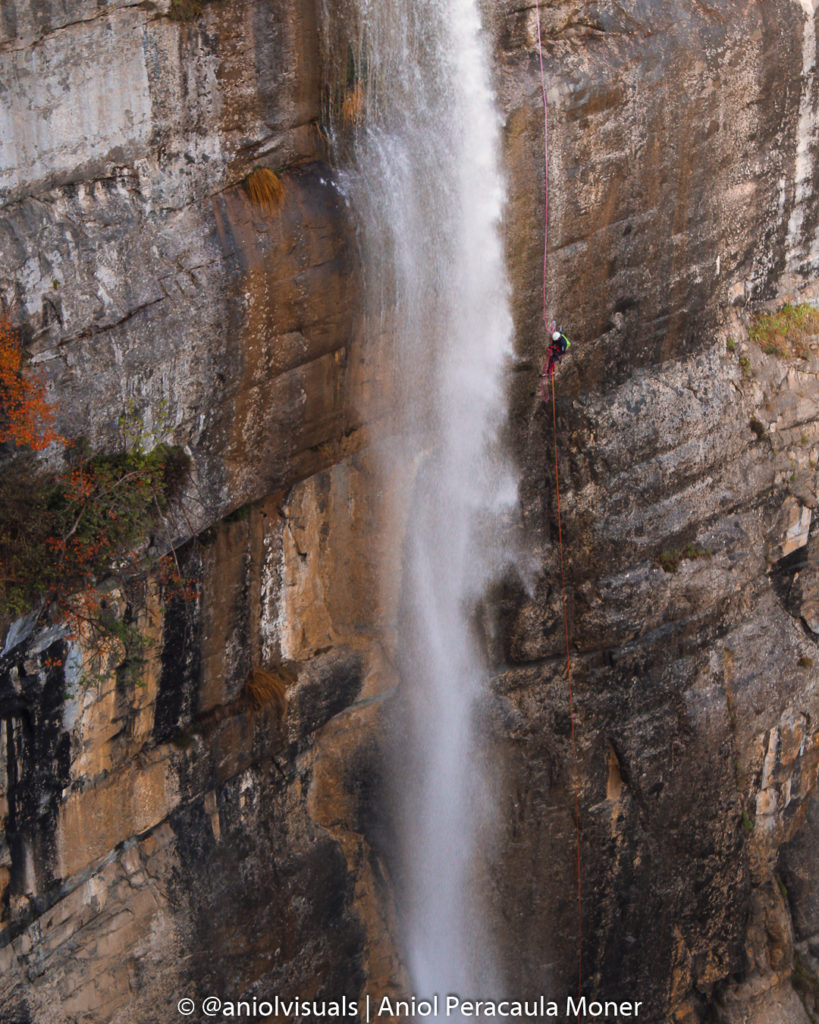
Taking landscape photography one realizes that we are so small (or so big) compared to our surrounds. The same happens with waterfalls. Sometimes it is difficult to estimate the size of a waterfall just with one image. In these cases, it is when the human factor plays a very important role. This is the third of my waterfall photography tips. Adding someone to your picture makes it completely different. Suddenly everyone that sees it can picture themselves in the location. It is quite well known that landscape images with humans in them get more likes on Instagram that those who don’t. If you do not believe me, just try it. It works like magic!
A couple of things to take into account when adding people to an image. The position of the person in respect to the camera and the waterfall will determine the size estimate of the waterfall. If the person is just by the waterfall, and you are at a considerable distance, the waterfall will look huge. However, if you position the person strategically it is possible to play with the size estimates of the audience.
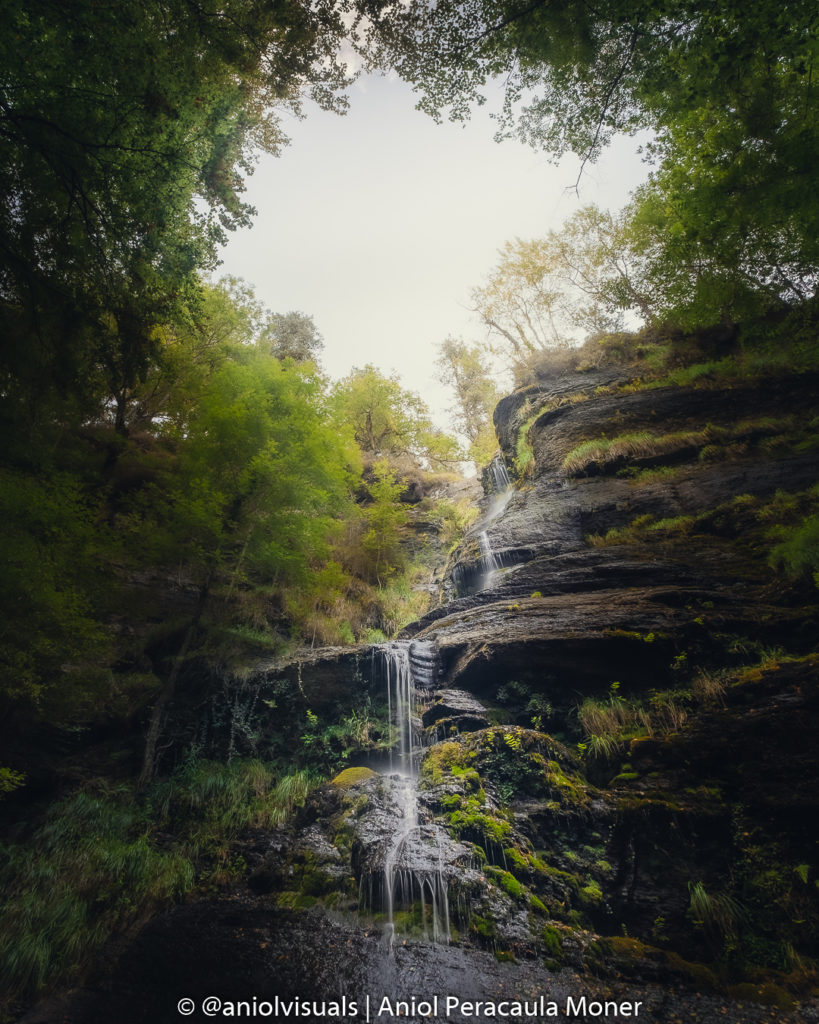
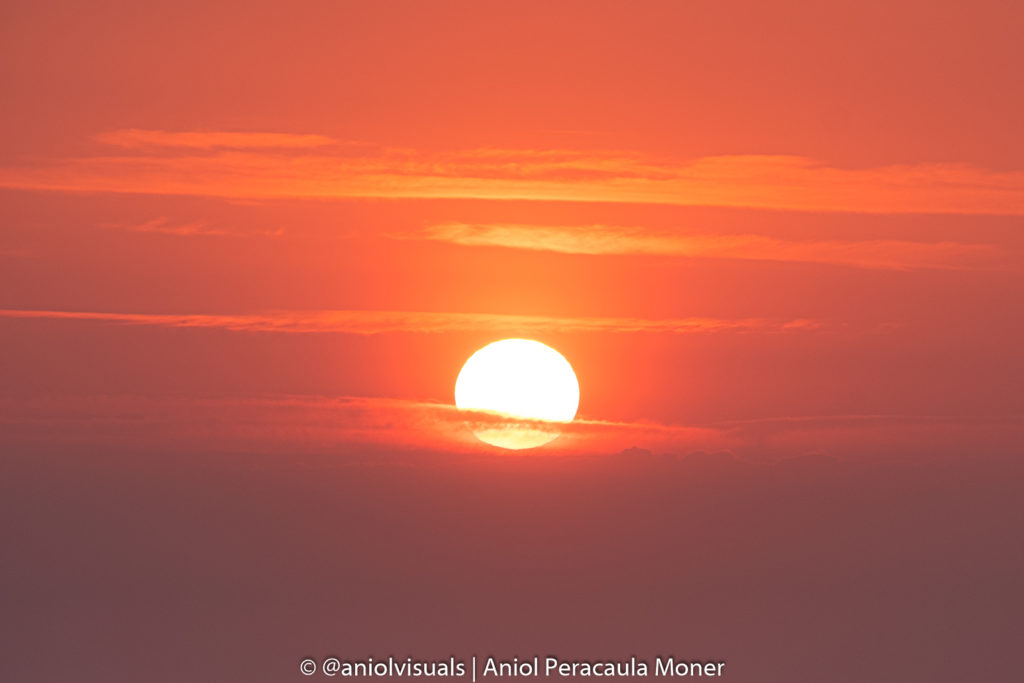
Air and sky
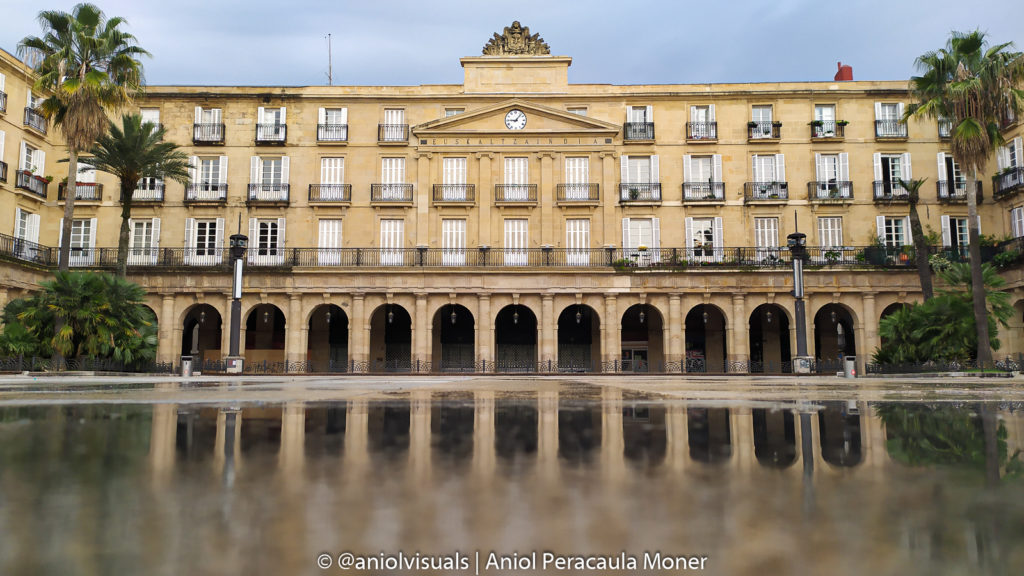
I already mentioned how it is a big mistake to consider that there is only one element in an image with a waterfall. The sky and the “air” of the image are crucial in waterfall images. The sky or the air, is the free space, the area that makes the image breathe. Here, the rule of thirds can be very handy. One-third of the sky, one-third of the waterfall, one-third of the foreground. Of course, rules exist to be broken, and some situations demand a different composition. However keep this basic structure in mind, and start working from there.
When we talk about air and sky, not always means to have a blue sky. For example, in situations where there is no sky, such as in deep forests, use the “air” space to be the source of light of the image. Even if there is no sun, when you edit the image, you will be able to modify it. Keep in mind how you want to process your image when you are taking it.
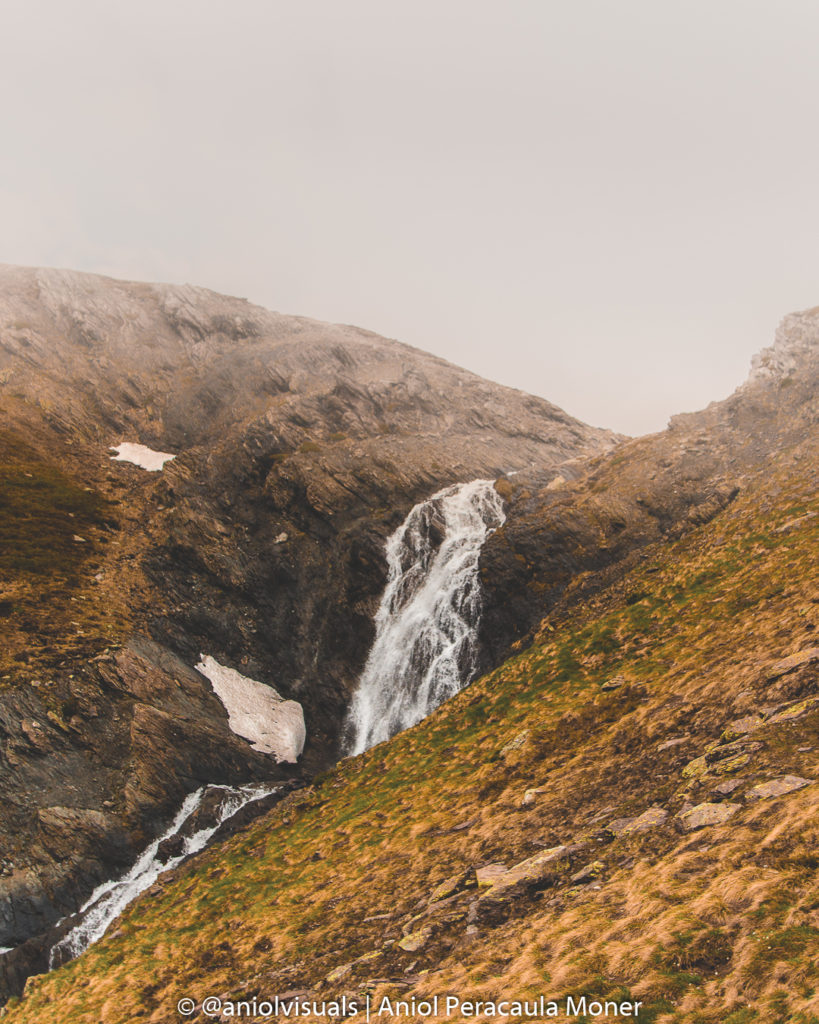
Waterfall seasons
Unfortunately, taking waterfall images in the Northern Hemisphere at mid-August is usually a bad idea. Unless you live in a very humid or rainy place, waterfalls are in their peak during spring and autumn, the rainy seasons. I still remember the day I went on a sunrise mission at an amazing waterfall to find a dry dusty river bed. Two months later, I had to take off my shoes to cross the river. If you see that in the dry season there is a huge storm coming, get ready. For a short period of time, if the waterfall is small, it will look like it is mid-April.
However, not all situations are extreme. Sometimes, less water means easier access to the waterfall, or that areas that are usually covered by water are now visible. Before visiting a waterfall, there is an easy trick to find out if it is carrying a lot of water or not: Instagram. Nowadays it is impossible to find a place not listed on Instagram. At least use it in your favour and scout the area before visiting it. Even if the waterfall you are looking is not listed on Instagram, if you find someone that has taken an image from this area, send them a message, and most of the times you will get a positive answer and some local tips.
Your position
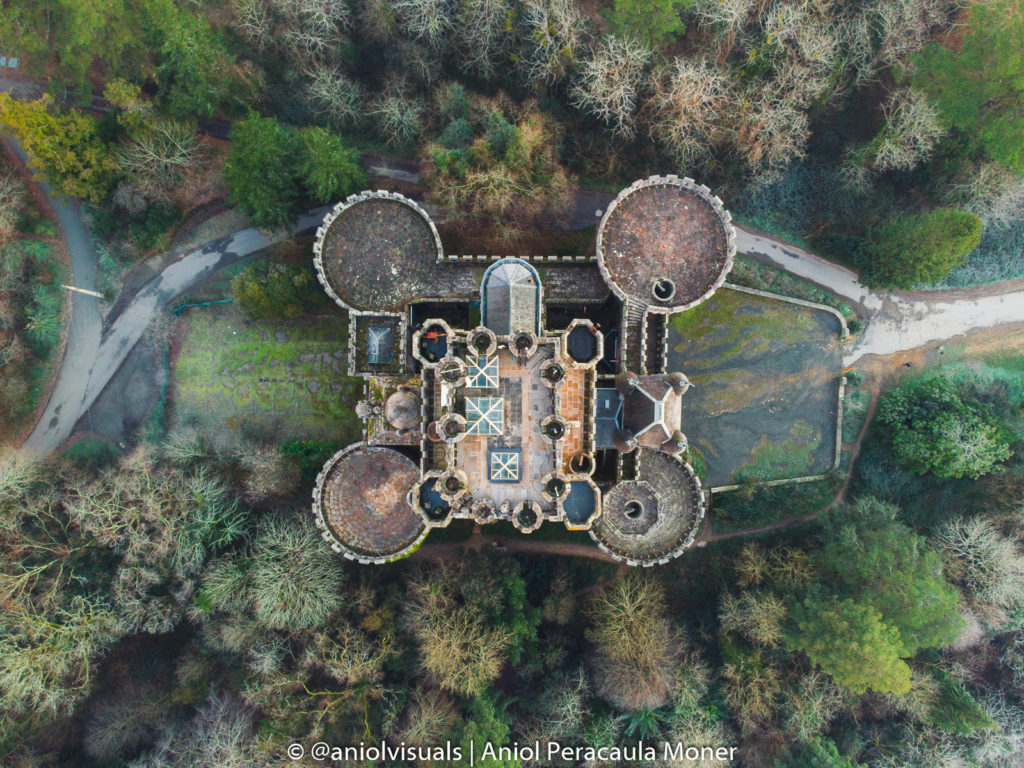
In almost all the previous waterfall photography tips, for one reason or another, I talk about the position of the photographer. Because it is essential. Why do you think that drone images are so powerful? Because we see things from a different point of view. Taking waterfall images requires a lot of planning, especially in the cases where the waterfall has many stages. I usually look at three things to decide the final position.
The first one is the water flow. I don’t want to block the water flow unless it is for a specific reason. Being able to follow the route the water does will play a very important role in where I will be located.
The second one is the distance with respect to the waterfall. It will depend a lot on the type of image I will be taking. It also plays an important role if I will be using a foreground element or if there will be someone in the frame,…
The final one is my height. I don’t mean if the image will be taken using a drone. I mean how close to the floor (and sometimes to the water) I want to be. It is a very important element for my final decision, and it is usually the one I give more weight to, but keeping the other two on acceptable values.
Waterfalls are amazing, and just like Heraclitus said: No man ever steps in the same river twice, for it’s not the same river and he’s not the same man. This is the same with waterfalls. They change, evolve, rocks are eroded, plants are born, flowers bloom, and this makes it impossible to take the same image twice. I hope some of my waterfall photography tips have been useful for you!
Now you are ready to grab your camera, tripod and filters and get out there. Enjoy your time taking photos. If you want to share your images with me, do it using #aniolvisuals or tagging me on Instagram (@aniolvisuals). If you want to see more of my work, follow me on Instagram or Facebook. And If you are interested in using my images, please contact me using either the contact form or send me an email at aniolvisuals@gmail.com.
Spread the word!
Drone photography with a DJI Mini 2: best tips to take amazing photos
10 reasons to stop posting on Instagram as a creator
Solo travel photography: 11 tips you have to know
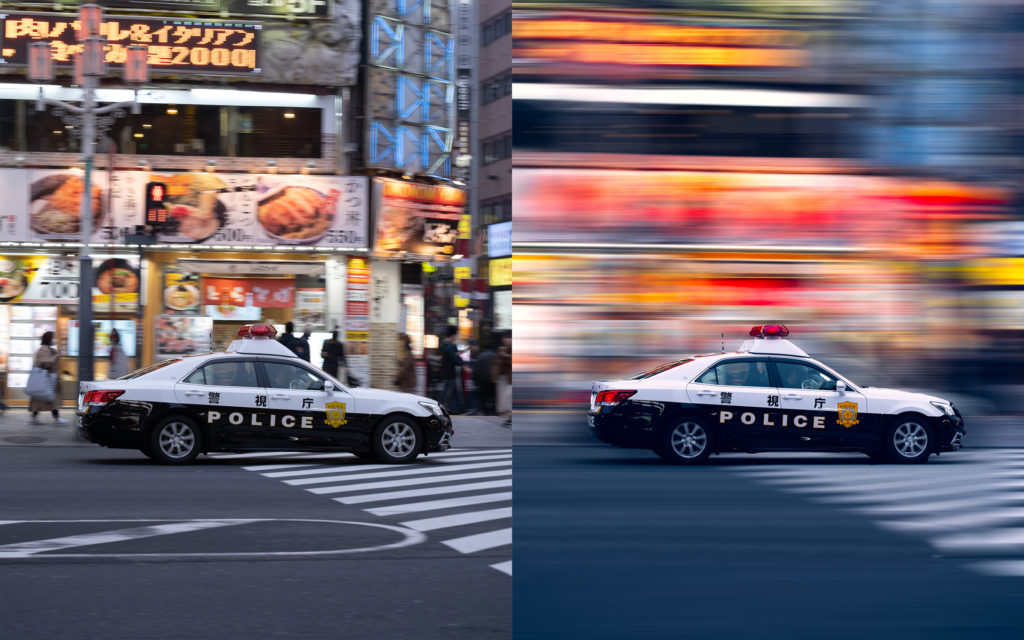
Panning photography: how to take it and how to fake it (Photoshop)
10 differences between camera and smartphone photography: an ultimate list