Discover how to take amazing panning images and how to create the panning photography effect with Adobe Photoshop.
The panning photography technique
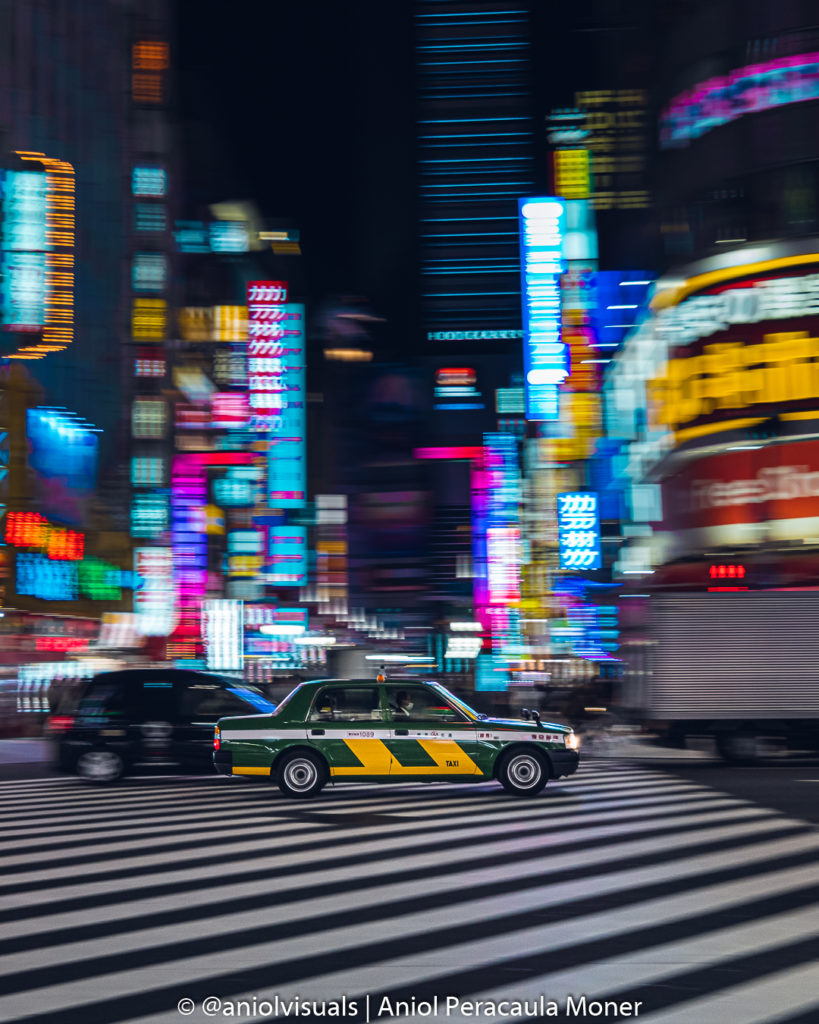
There are many ways to express movement through photography. One of the most powerful ones is panning photos. The panning technique consists of setting a slow shutter speed and taking a photo of a moving object while following the object with the camera. This creates a final image where the moving object is in focus and the background and other elements are blurred.
How to express motion through an image
Long exposure, panning, lights… discover all the methods here!
Taking a photo using the panning technique requires some practice and trial and error. One of the best ways to get some experience with panning photography is a busy junction or avenue. Get close to a road with a constant flow of vehicles, and use them as test models. There are three main elements that have to be taken into account to take good panning photography:
- Shutter speed
- Target speed
- Camera position
Shutter speed
The most important element of panning photography is the shutter speed. Choosing the right one will make it easier to obtain the expected result. As with other elements in photography, it will depend greatly on the situation and the other 2 variables commented below.
There is a simple way to decide the perfect shutter speed for a moving target. Ideally, a shutter speed of 1 second would be perfect, as we would be able to follow the target for a long time and get a very blurred background. However, this is almost impossible, as this would require following a target with the camera for such a long time and the chances of getting a blurry photo would increase exponentially.
Thus, the ideal shutter speed value should be the one that allows following the target but still get sharp results. It tends to be a value between 1/4 – 1/30 of a second. In some extreme cases, values close to 1/60 can work. Start with the fastest shutter speed (around 1/30), and take a sample photo. Even if the target is not perfectly sharp, if the effect can be seen, keep working with this shutter speed. After getting some experience with the panning technique, try slower shutter speeds, but remember, it will make taking a good (sharp) photo a more challenging process.
Target speed
The second important element when taking panning photography is the speed of the target. A car moving at 20km/h and a car moving at 100km/h will require a different approach. The main reason for this is that the distance that each one will cover with the same shutter speed will be different. Thus, different target speeds may require different shutter speeds. It is, the panning effect may appear with a fast-moving target at 1/60 shutter speed, while a slower moving target will need a 1/15 shutter speed. A very visual and extreme example is comparing an F1 Car and a person walking.
Moreover, acceleration also plays a key role. The easiest targets for panning photography are the ones that have a uniform constant speed. If the target moves at a constant 40km/h speed, the movement of the camera when following it needs to be constant. However, a target that accelerates and decelerates requires the camera movement to also accelerate and decelerate.
Related to this, a car and a human are completely different targets as they move very differently. Whilst all elements of the car move at the same speed, a human or animal will move their body parts at different speeds. In such situations, aiming for the element that is the target of the photo, usually, the face.
Camera position
The distance between the target and the element is also important. It’s not the same to shoot at a car from the tier of a racing circuit or from the pavement. Even if moving at the same speed, the movement of the camera will be more extreme (move more) the closer to the target. This is because the space that needs to be covered with the camera movement changes as a function of the distance between the camera and the object.
Panning photography with Adobe Photoshop
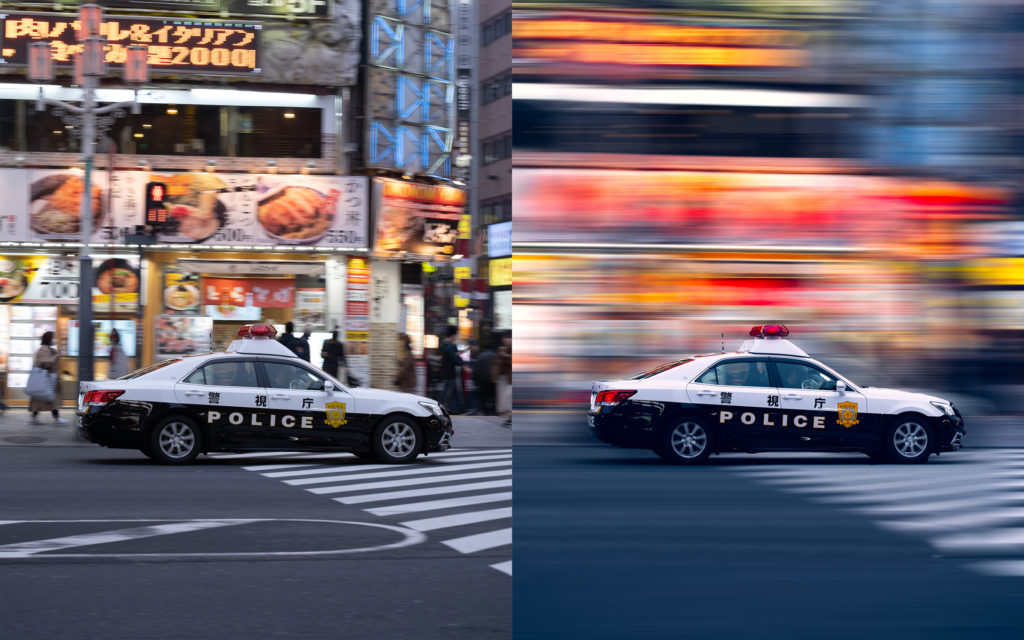
It is not always possible to get the panning effect right from the camera. Maybe it is because of technical difficulties or just because of a lack of time/will to take this photo. In my opinion, if you can, take the panning image. The effect can be enhanced using Photoshop as well, but some of the work will be already done. Let’s start with a quick example:

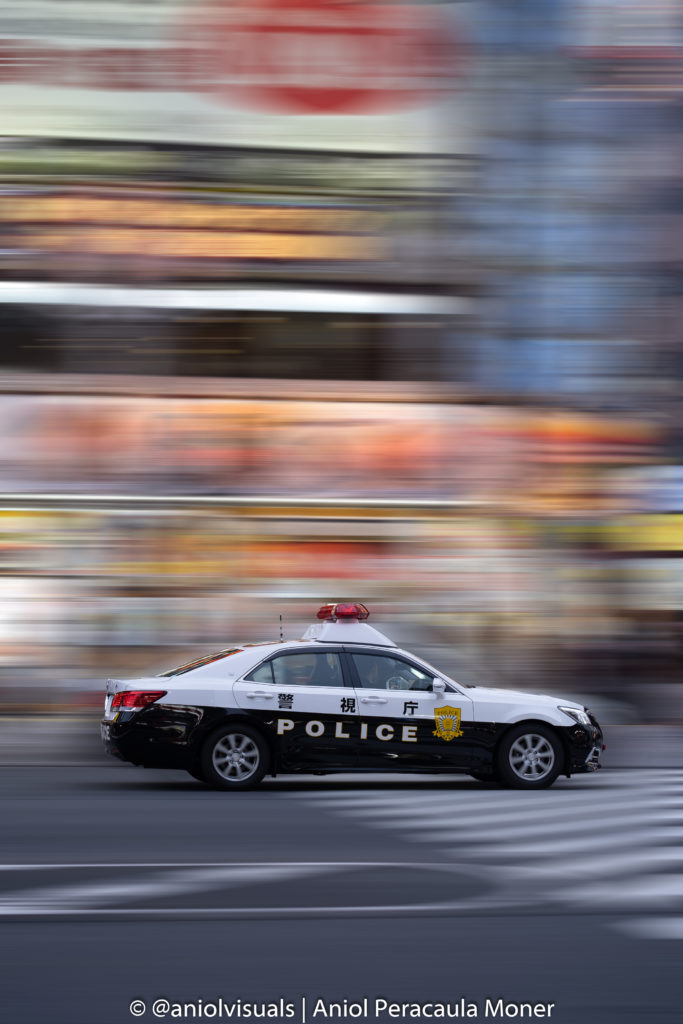
Above these lines, there are two similar images. The one on the left (or top) is the original photo I took, while the photo on the right (or bottom) is the Photoshop created panning. The first one already has a slight degree of panning, however, the effect is enhanced on the second one. Would you like to learn how to do it using Photoshop? Keep reading!
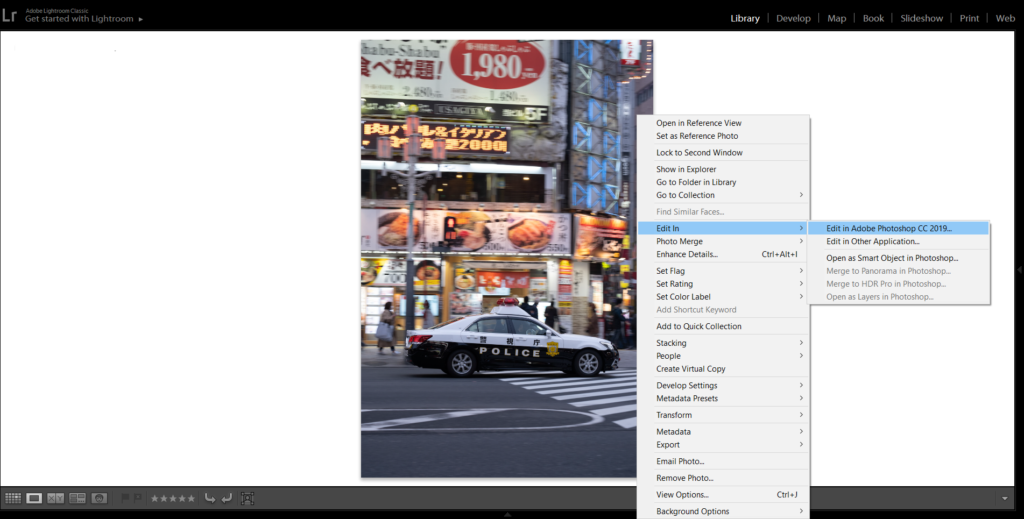
Load the photography in Photoshop
Open the photo using Photoshop. If you have your images loaded on Lightroom, it is possible to open them in Photoshop and later on have the edited version back in Lightroom. To do it, select the photo in your Lightroom library right-click it and select “Edit in” – “Edit in Adobe Photoshop”.
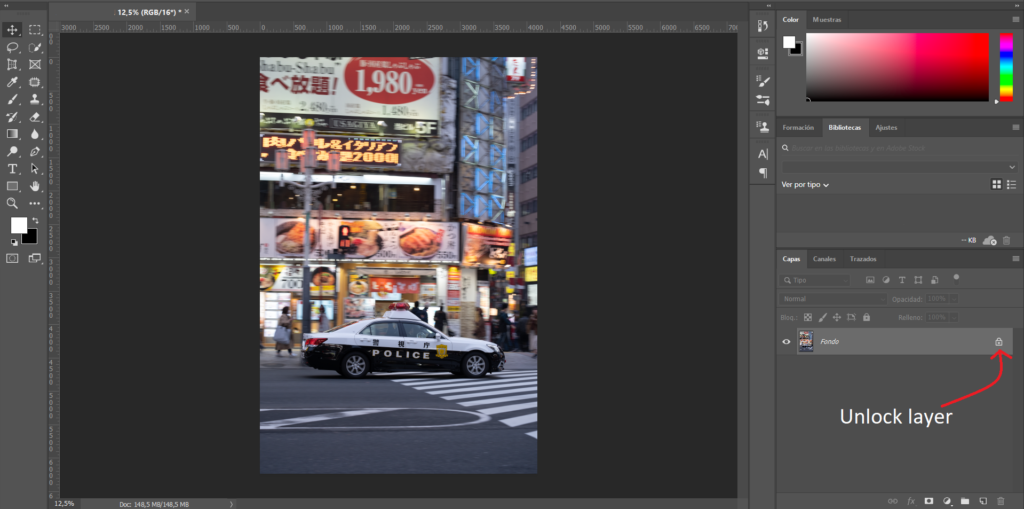
Make sure your layer is unlocked so you can work with it. To unlock it, click the lock that appears next to the layer on the right-hand side panel. This is how your interface should look like.
Select the element
The next step is to select the element that you want to keep sharp in your image. In this case, it is the police car. There are many ways to select an object. Here I will explain 2.
In some cases, I use the “Quick Selection Tool”, accessible on the left panel in Photoshop or at the “W” key. Then, click on the object you want to select and drag the cursor over it. Depending on the similarity between the object and its background, the selection will be more or less accurate. Refine it by changing the size of the “brush” and adding or removing sections. To remove a section hold the ALT key and drag it over the area you want to remove. It can be a tedious task, especially if the target and the background are very similar, as the tool does not detect the edges of the object.
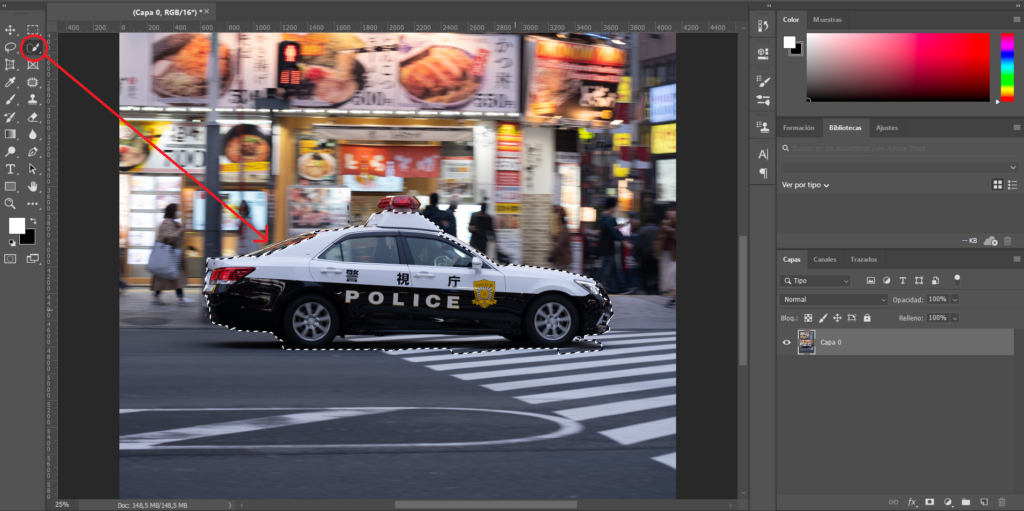
The image above shows how a quick selection would roughly identify the object. More adjustments (alt key, and changing the brush size) would be required to get a perfect selection. Thus, I would recommend using the second solution.
When the object in the foreground and the background are very similar, the fastest solution to select an object in Photoshop is to use the pen tool. It is available in the left panel or with its shortcut P. With the pen tool trace the silhouette of the car, by adding points like in the image below. After the silhouette has been completed, click “selection” on the top bar and accept, creating the selection of the object.

Isolate the element
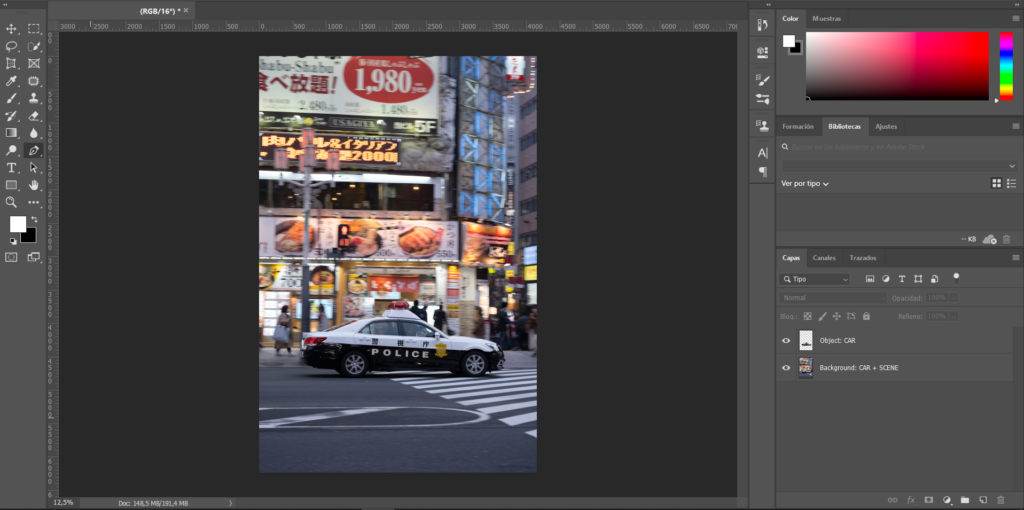
Using one technique or another, the selection will now be complete. Copy and paste the selection, creating a new layer with just the silhouette of the car. Just by doing Ctrl C + Ctrl V (Cmd C + Cmd V), a new layer with just the selected object will be created. Make sure to rename them for informational purposes, like in the image below. Now everything is ready to simulate panning photography using Photoshop
Create the panning photography effect in Photoshop
Select the layer with the original image, in the example above “Background: car + scene”. Go to Filter – Blur – Movement Blur. A window will appear, where 2 variables can be adjusted: the angle of movement and the distance (or size) of the effect. Make sure to create a realistic effect, with an angle of movement congruent with the original movement of the object. In this case, as the car is moving horizontally, I choose a 0-degree effect. Click OK and the effect will be applied to the image.
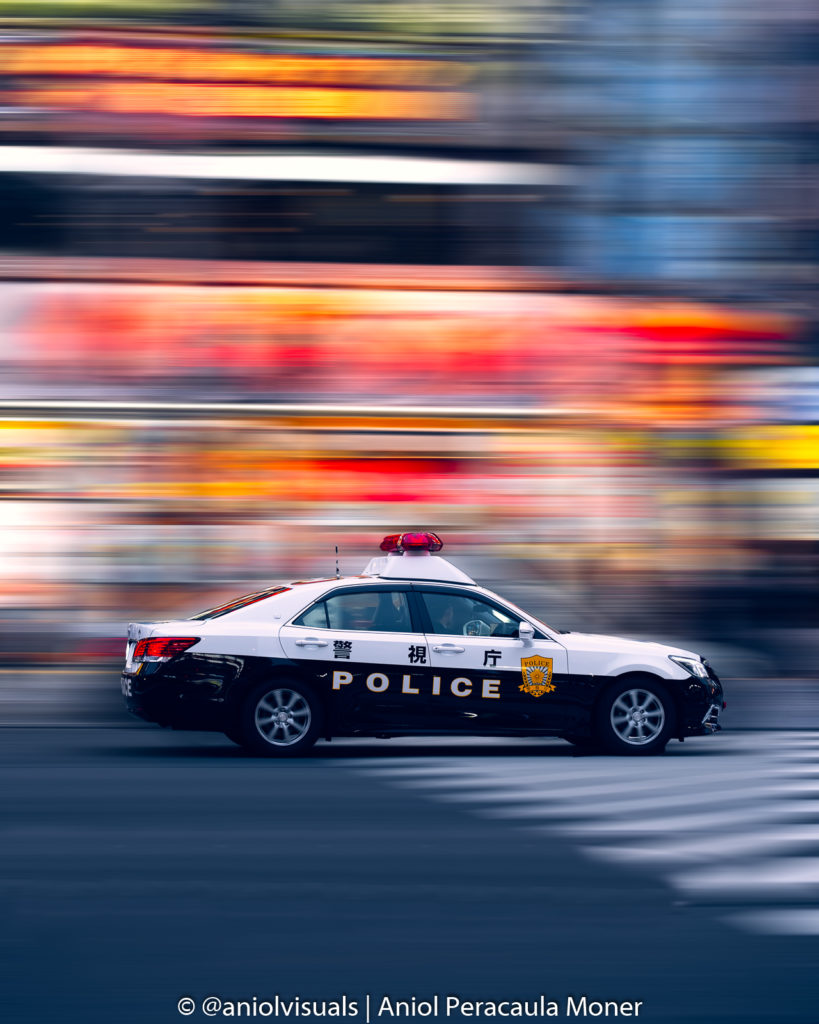
This is how you create fake panning photography using Adobe Photoshop. Do you have any other technique to create the panning effect using Photoshop? After some Lightroom editing, this is how the final photo looks like. Although I prefer having the panning effect straight from the camera, this is a very useful way to enhance and give a special touch to an urban photo.
Now it is your turn to create some panning photos. Try the technique, and if the in-location session is not successful, you now know how to create a panning effect using Adobe Lightroom. If you like photography, make sure to check my photography tips page. For any questions, you can find me on Instagram (@aniolvisuals), or send me an email at hello@aniolvisuals.com.
Improve your travel & landscape photography skills!
Find out tips, tutorials and guides to help you take better photos! Check them here!
10 differences between camera and smartphone photography: an ultimate list
Panning photography: how to take it and how to fake it (Photoshop)
My best 2020 images. Part II: Japan photography
7 tips for amazing cloudy sunset (and sunrise) photography
How to take amazing reflection photos: 10 tips you must know