Use these 10 reflection photography tips to take amazing photos! From basic tips to advanced gear tricks, this guide has it all!
Reflections are one of the most visually attractive photos out there. Sometimes, even bad compositions that include a reflection can make for a good photo.
Photography has many rules, some of them very complex, or not so well-known, but if you want to take a pleasant photo, look for a reflection, and you will instantly get a great shot.
It’s the symmetry, the balance, the pleasure of seeing an object reflected in any type of material that we can’t resist as humans. No matter if it is for an Instagram post or to give a special touch to a location you are familiar with, reflections are a sure-fire technique in photography. In this guide, I will present 10 reflection photography tips, covering aspects like the weather, the gear, and, most importantly, the reflective surfaces used in the photos.
Although it’s not the same to take photos in a city or in the mountains, these reflection photography tips can be of use no matter where you are.

Reflection photography FAQs
Before jumping into the specific reflection photography tips, here are some of the most commonly asked questions when it comes to taking reflection photos:
What is the best weather to take reflection photos?
Any weather is good for taking reflection photos; it will depend on which photos you want to take. For landscape reflections, look for days without wind. In cities, rainy days are amazing when it comes to reflection photography, as it’s full of puddles, perfect for taking great shots.
What is the easiest way to take good reflection photos?
The easiest way to take good reflection photos is to observe first and then shoot. Reflections are usually very beautiful, but if you don’t compose your photo correctly, it will be just an ok photo. Learn how to compose, add a good foreground, and your reflection photos will be amazing.
What is the best gear to take reflection photos?
You don’t need any specific gear to take reflection photos. However, a polariser can be useful, as it can help remove the flares of water. Another useful gear for reflection photography is a tripod, as it can help create smoother reflections in not ideal conditions.
Can I take reflection photos without water?
Yes! Water is just one of the many ways you can take reflection photos. Use glass, watches, smartphones, mirrors,… your imagination is the limit, and the more creative you are, the more unique photos you will take.
Best weather to take reflection photos
As a travel photographer, it’s important to be flexible and know how to photograph different scenes.
The best weather condition to take reflection photos changes depending on who you ask. A landscape photographer will tell you that windless sunrises are best, while a street photographer will mention post-storm photo walks. Let’s talk about the weather in this reflection photography tips:
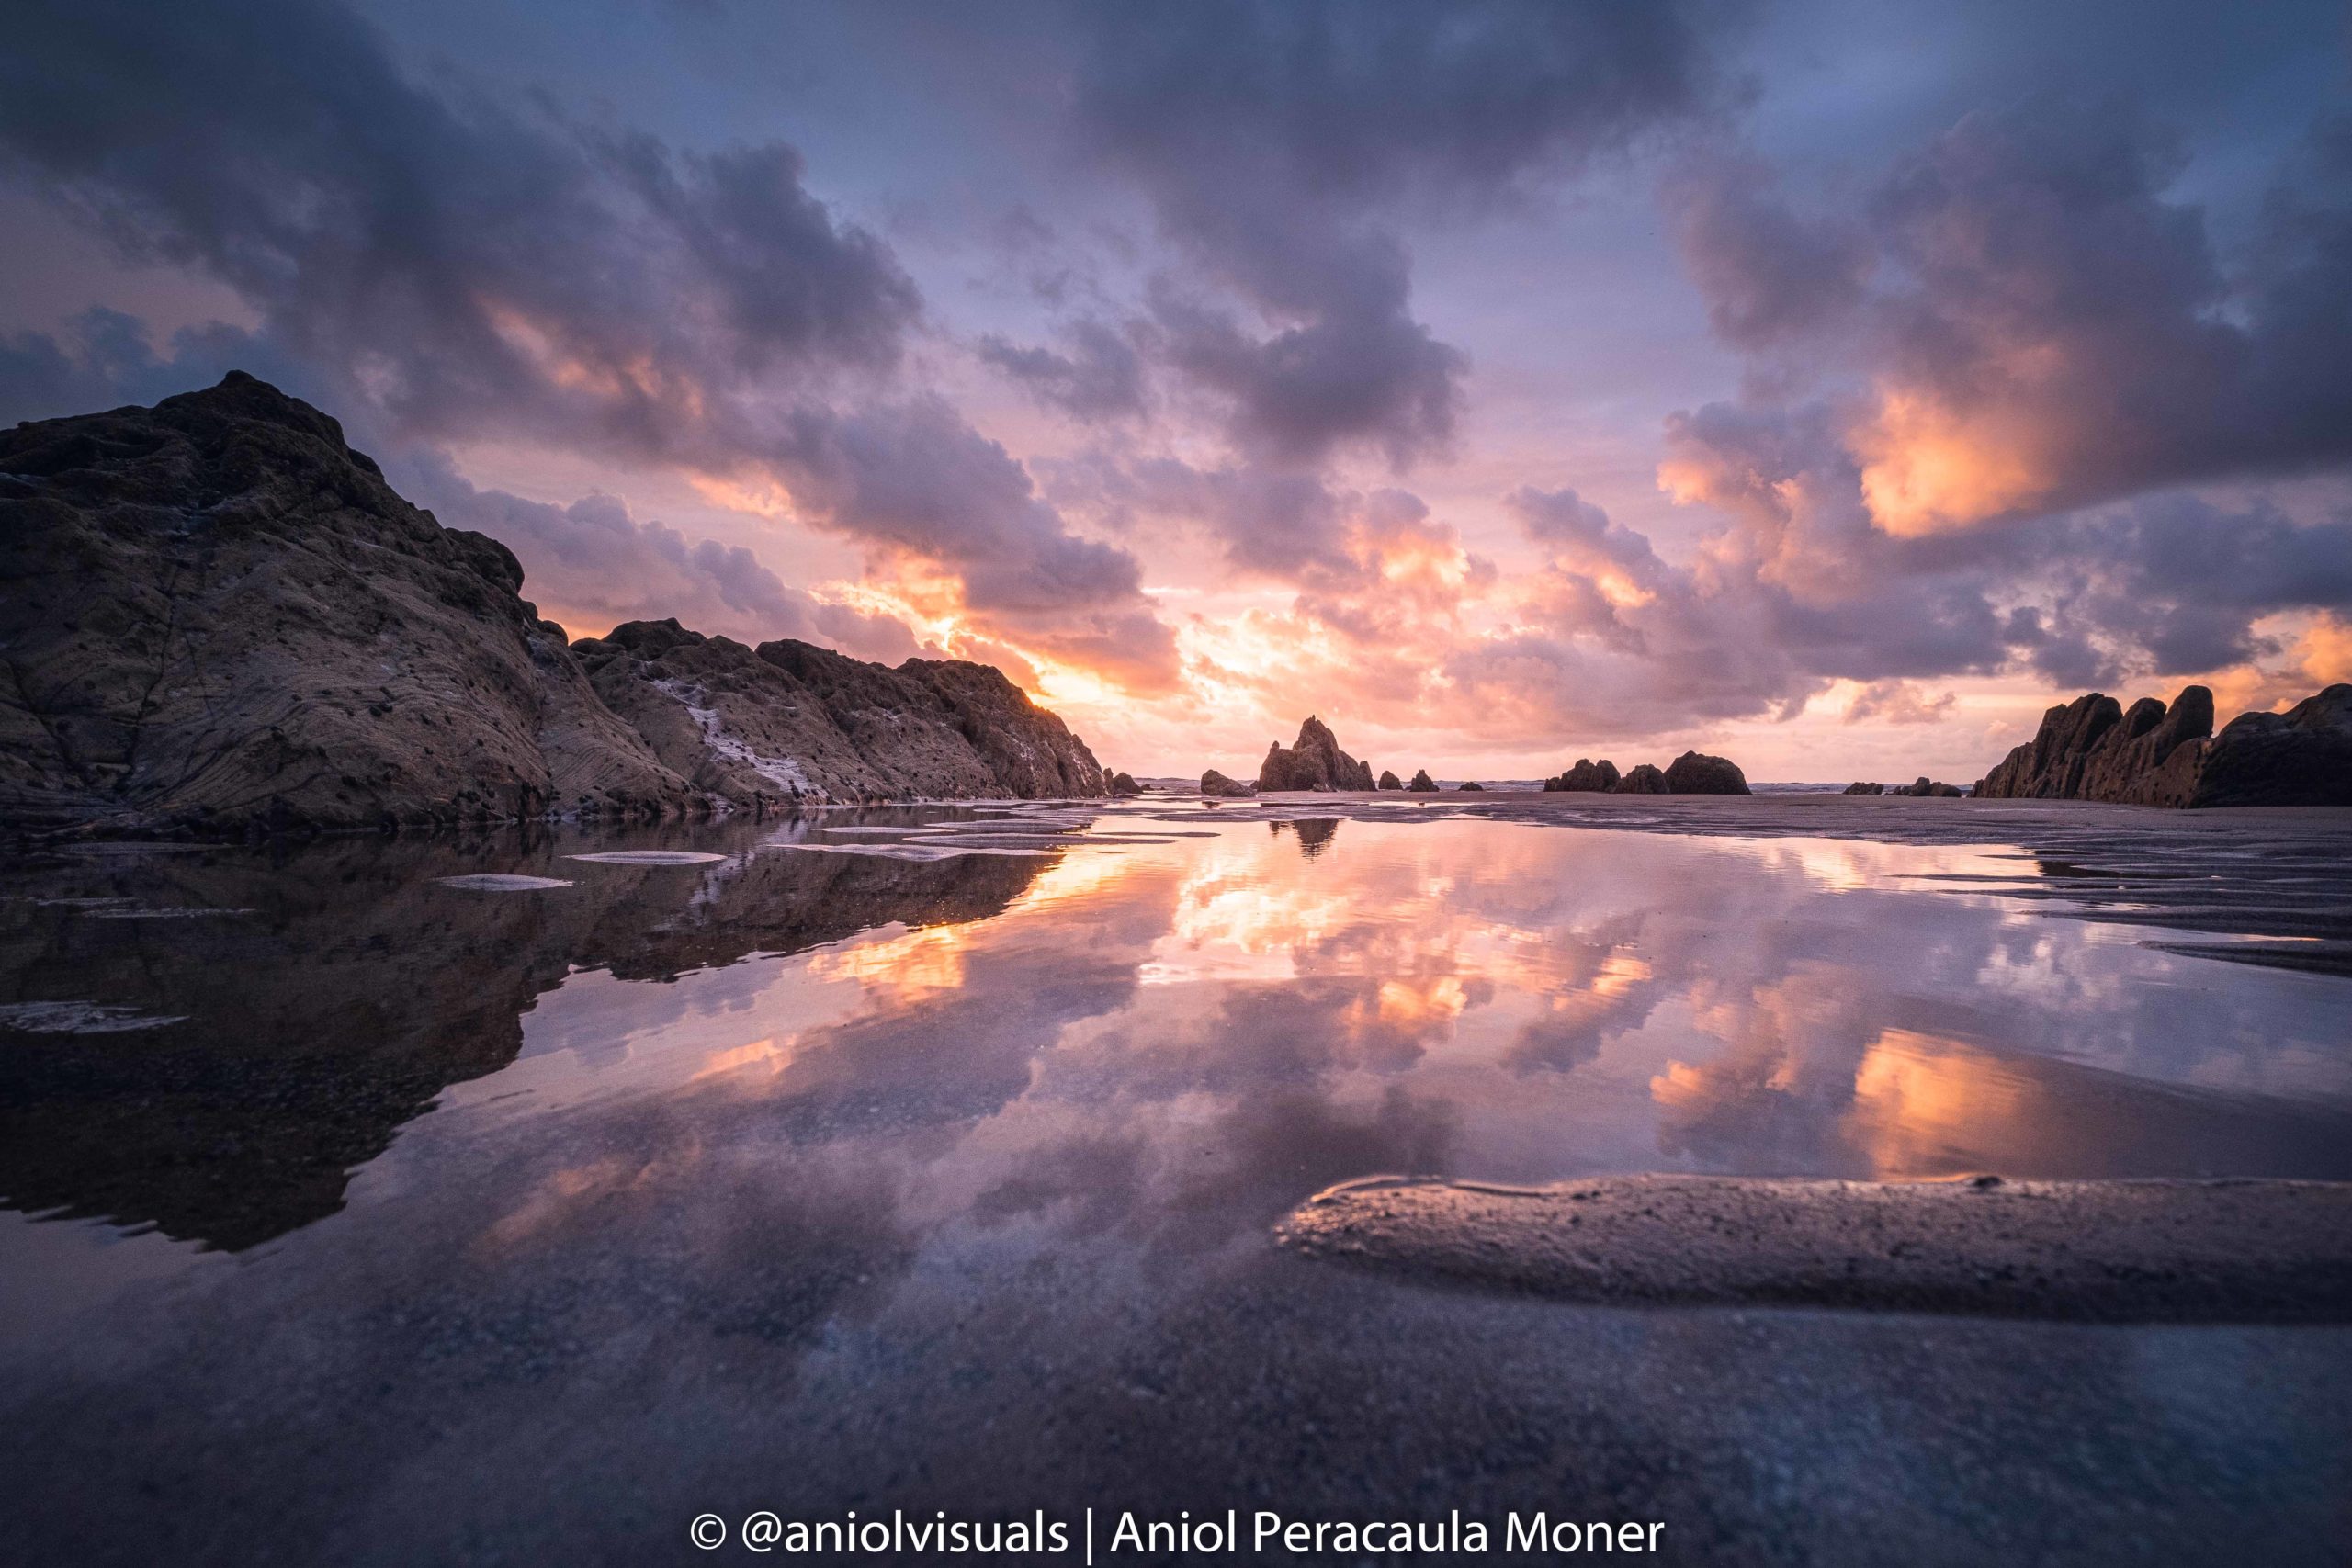
Landscape photography reflections: no wind sunrises
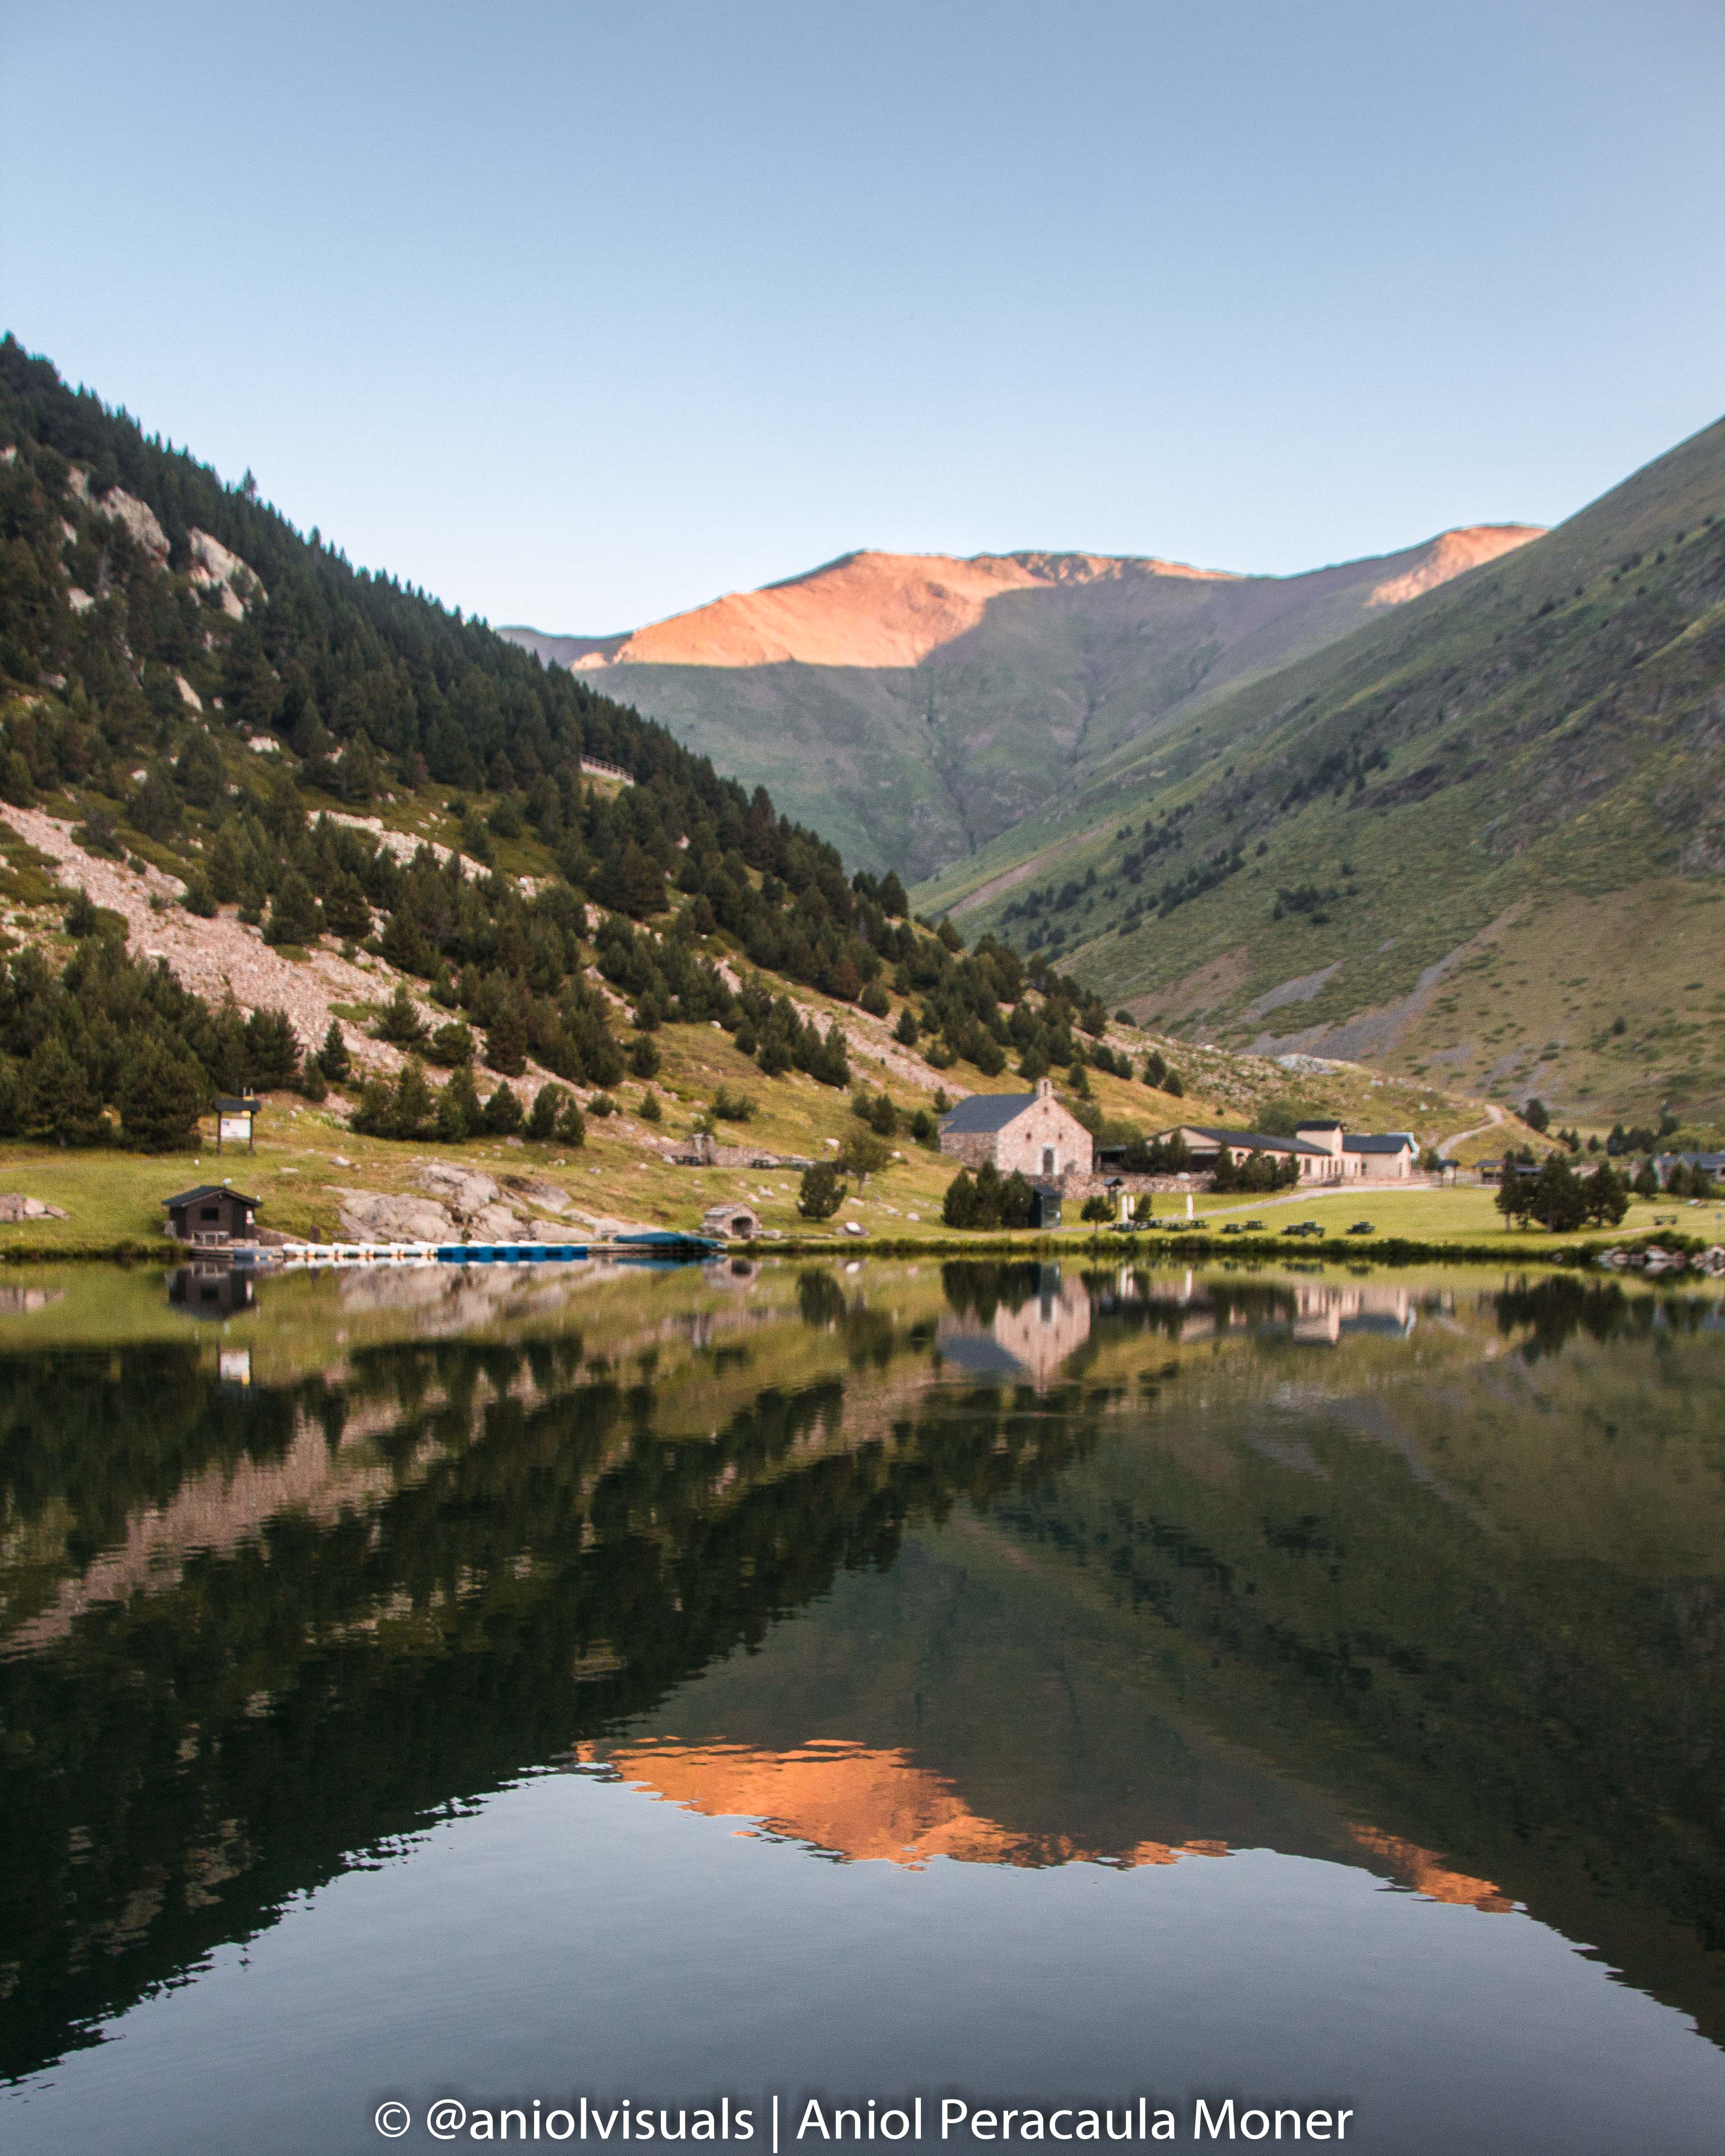
Picture this: you wake up in the middle of the night. It’s cold, you hike for 3-4 hours, and you arrive at a wonderful lake, surrounded by huge mountains. The scene is perfect. Reflected in the lake is a beautiful mountain range. And the moment you take your camera and start shooting, the wind starts blowing, and the reflection disappears.
Unfortunately, I have encountered this situation many times, more than I would like to admit. However, there is something that every photographer should know: wind can be less strong at sunrise.
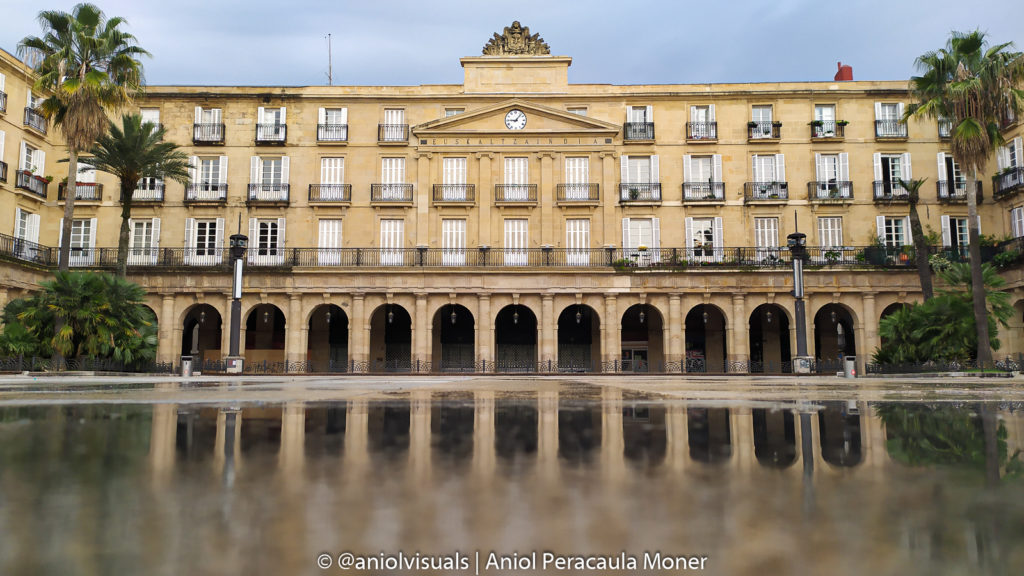
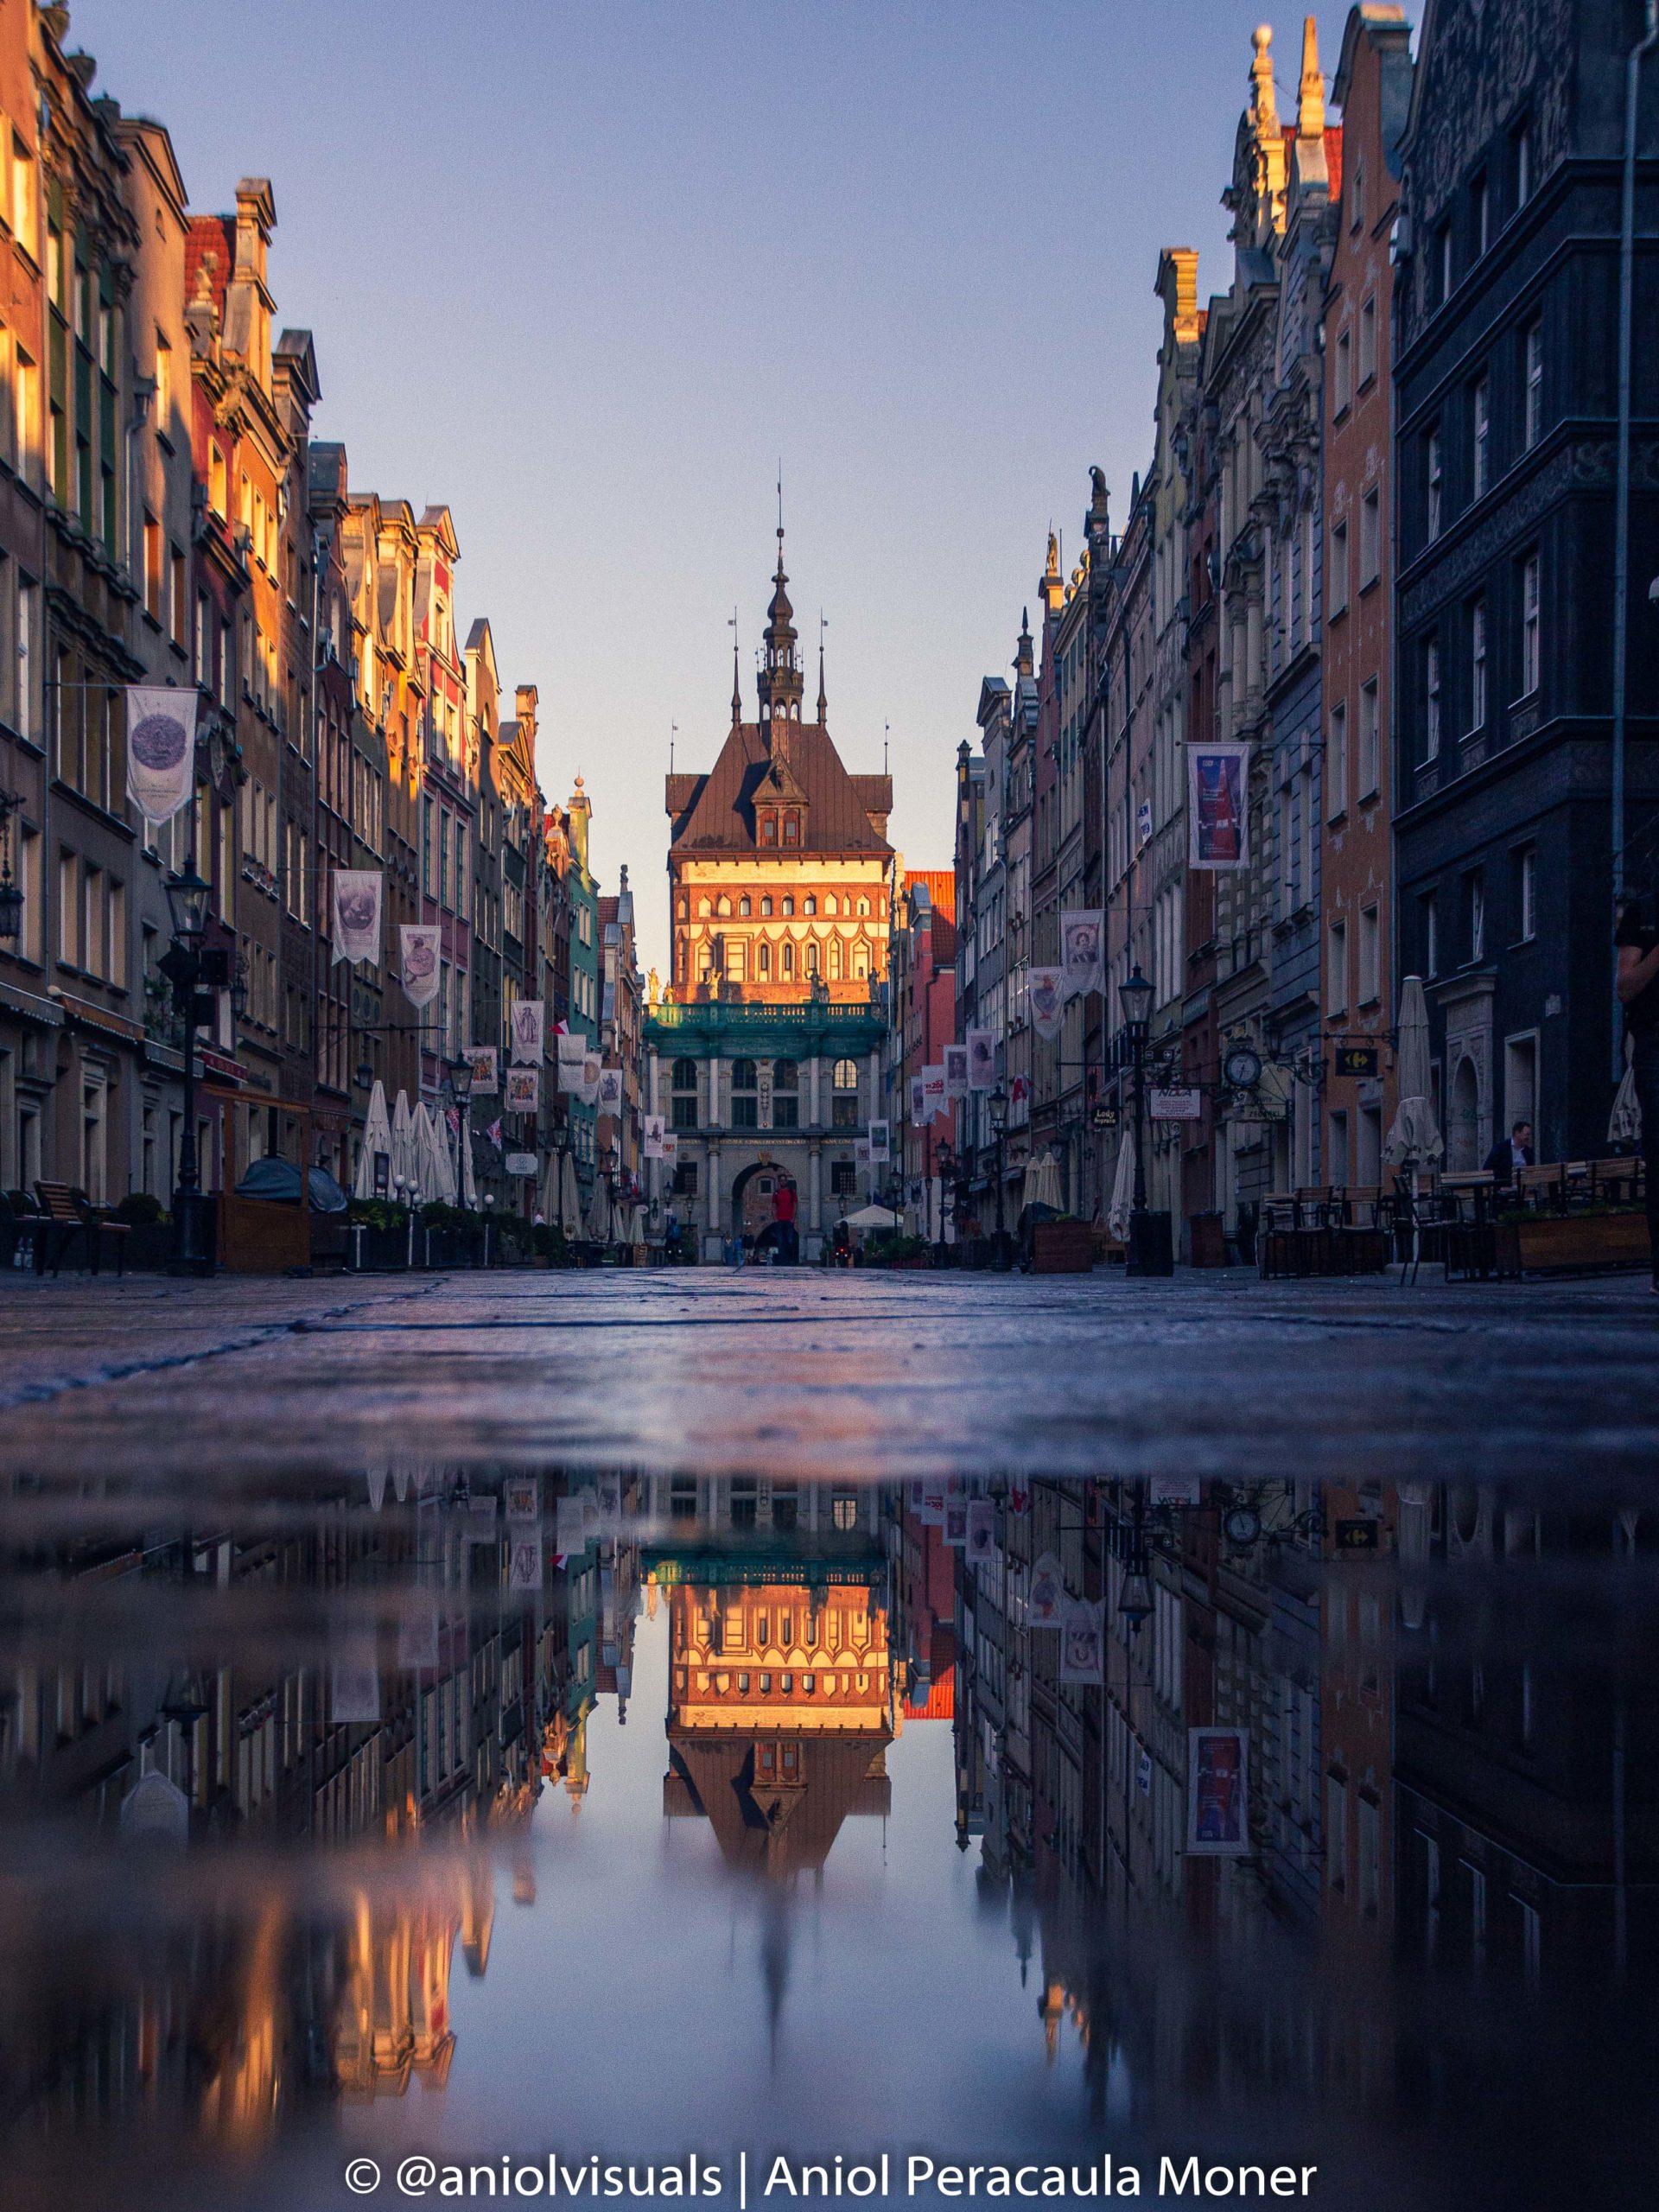
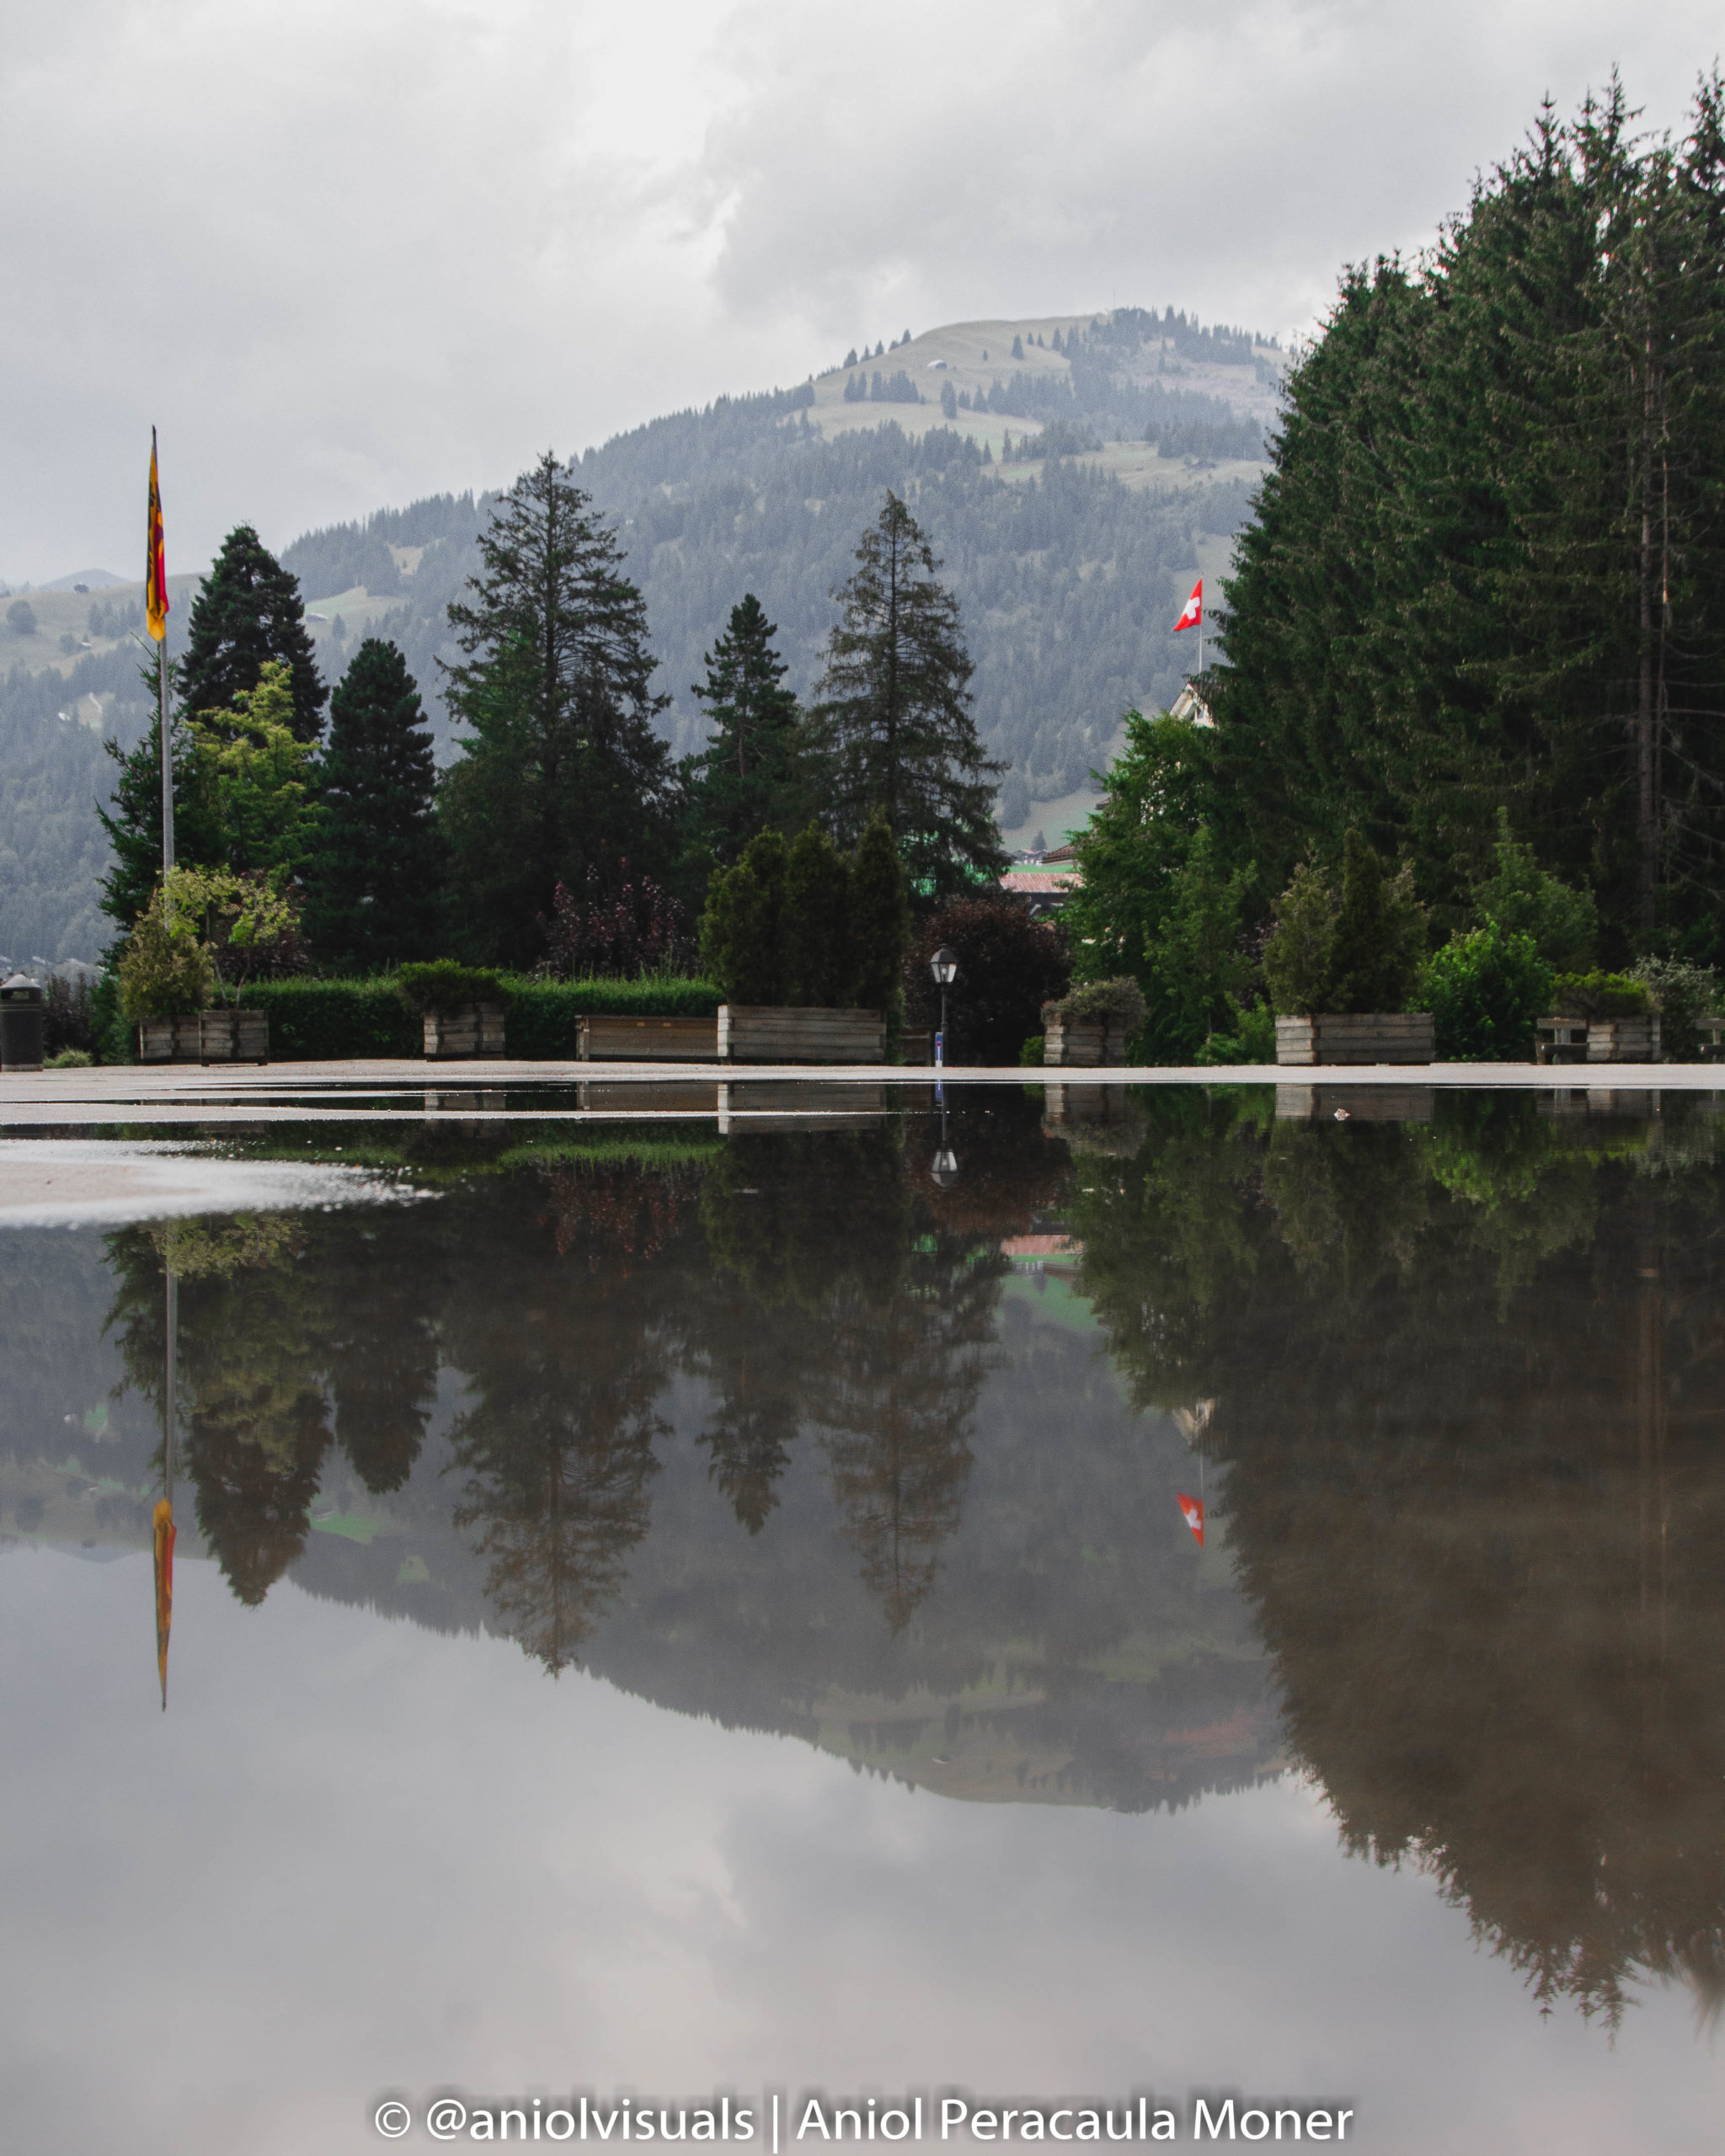
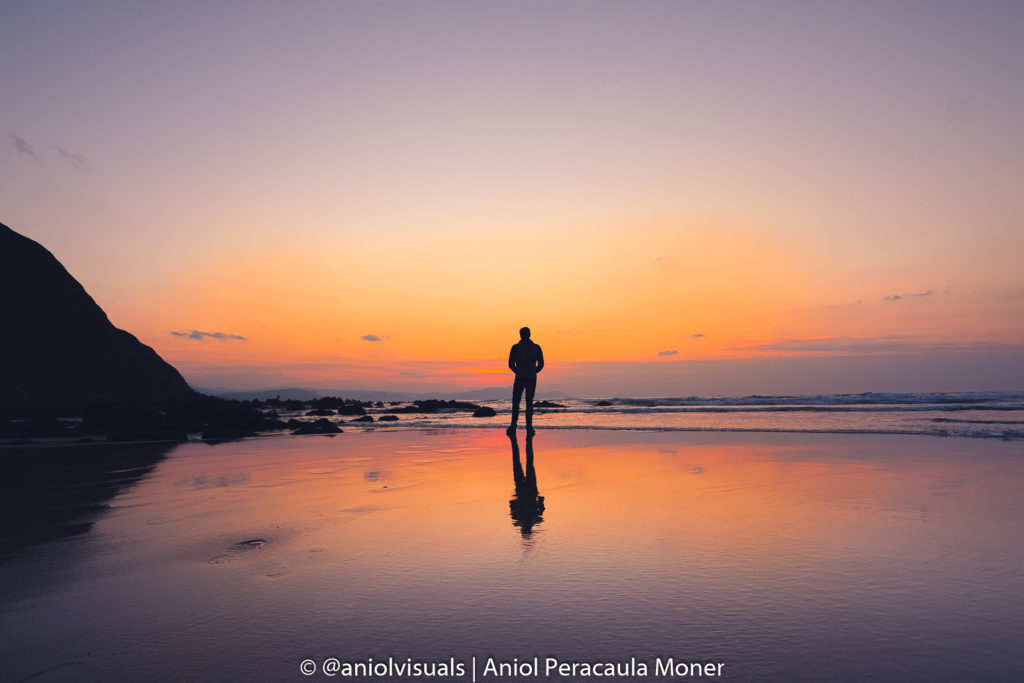
Waking up early can be very rewarding, not only because the light will be better, but because the wind is usually less strong at sunrise. This combination of different situations has given me many WOW situations, in which I have been able to take unique shots. While this is true mostly in the mountains, it also applies in some cities, as you can see in the photo below.
Bonus reflection photography tips: check the weather forecast before your trip. Most apps or weather forecast services include a wind forecast. If you see that the wind will be blowing by the time you are planning to shoot, forget going there to catch a reflection. For the best wind (and weather) prediction, check windy.com.

Street photography reflections: look for the rain
If you are into street photography, this is the most important of the reflection photography tips in this guide. There is nothing better than a rainy day. Wet surfaces help give life to your images and make them strong and powerful.
When I first wrote this reflection photography tips guide, I said, “Wait until the rain stops, then it’s time to get out and start shooting”. After many years of experience, this is only partially true. While the best reflections are found after a storm, taking photos while it rains is also worth it.
It will help you capture reflections together with the movement of water, something that adds a lot of dynamism to your images. Moreover, when it rains, fewer people are on the streets, and it’s way easier to compose your photos. Just make sure that your gear is waterproof, or that it doesn’t get too wet.
Once the rain stops, everything shines. Wet surfaces work really well in photos, and of course, random puddles and reflections appear at the weirdest places. In the middle of a street, at a crossing, or by a famous building. Experiment and create some different views.
Best surfaces for reflections in photography
The second part of this reflection photography tips guide focuses on my favourite topic: surfaces. There are so many ways to get creative, and it’s really important to know that reflection photos don’t always need to be on water. Water is the main way you can create them, but also the most obvious one. Taking reflection photos on other surfaces will always generate a sense of surprise in the viewer. Let’s see the best surfaces for reflections in photography
Water reflections
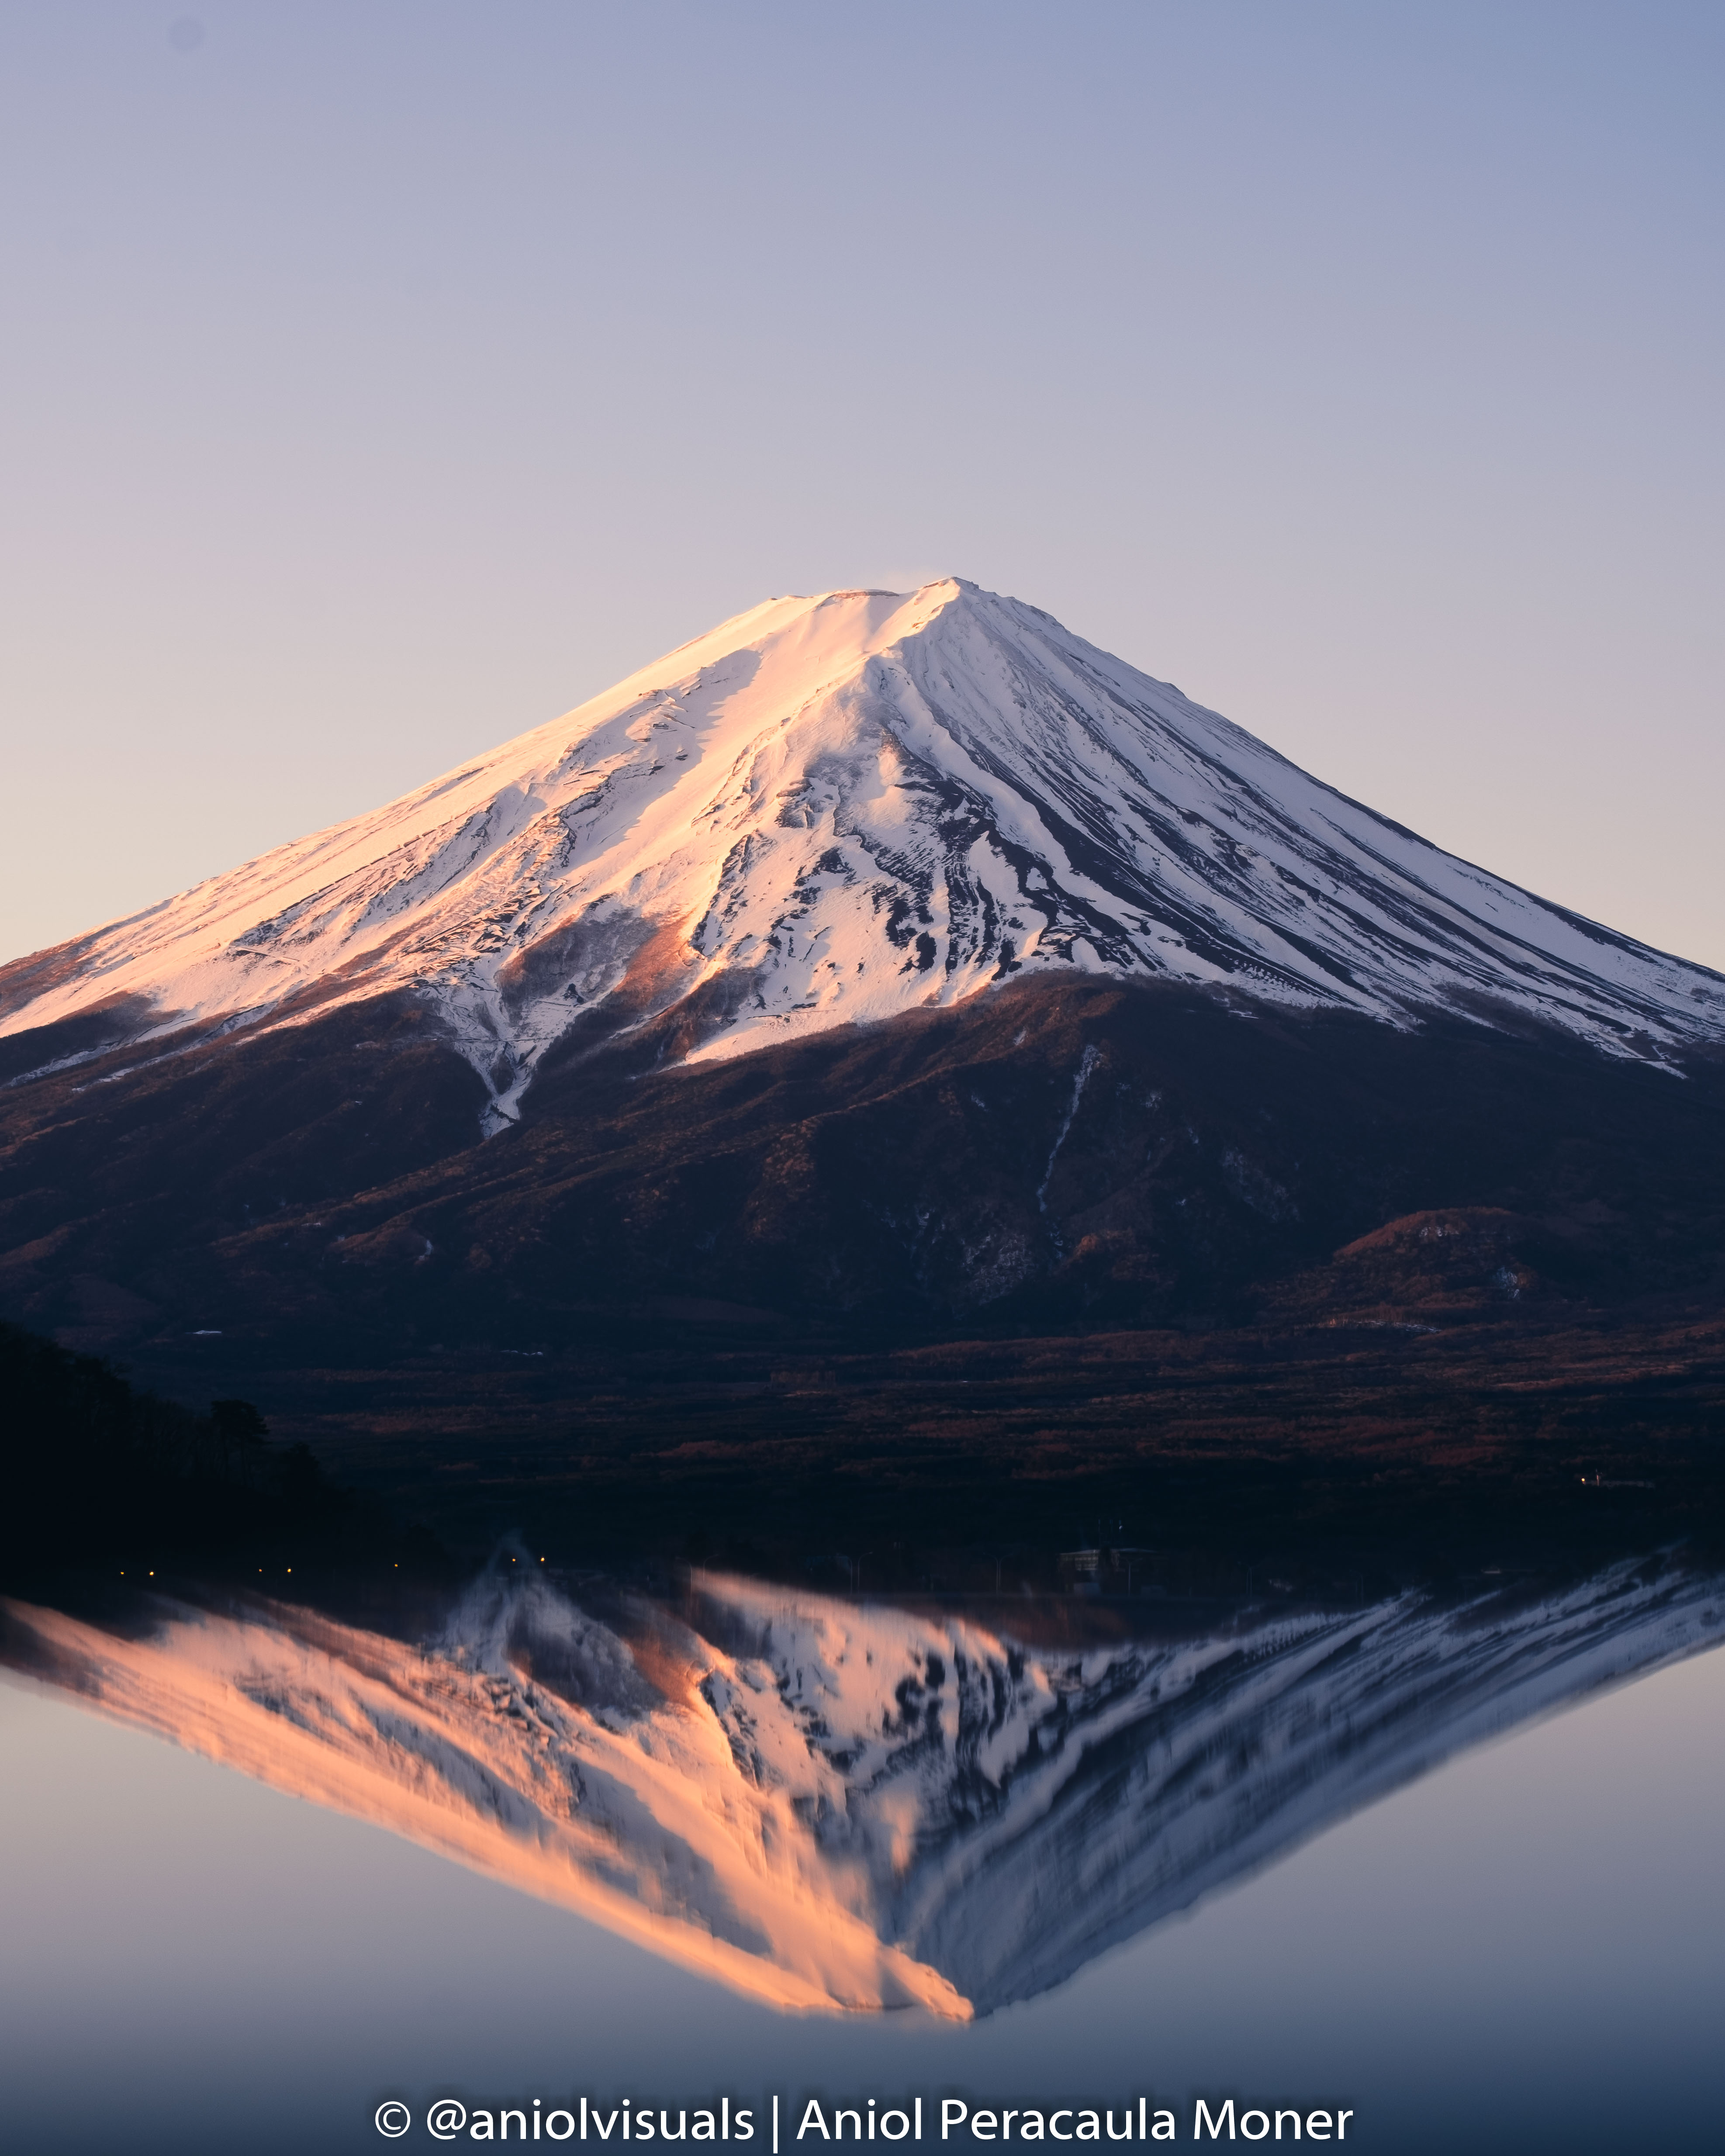
While it is obvious, water is the main way to take reflection photos. If you are mostly into landscape or nature photography, this will be your (almost) only way to take reflections. Besides the already mentioned role of wind, there are a few important things to mention when it comes to taking water reflection photos.
Maybe the most important one is that the size of the body of water has a huge impact on how the photo will look. For starters, the larger the body of water, the more it will be impacted by things like wind gusts. In fact, it could be that part of it is perfectly still, and another part of it has wind gusts breaking the reflection.
Another important part, which I’ll deep down in other reflection photography tips, is that composition is everything. Reflections are cool, but this doesn’t mean that any reflection photo will be good. In fact, it’s so common to find amazing reflection photos that are terribly composed. In the rush of the moment, photographers sometimes forget to breathe, think, and compose.
Glass reflections
This might be my favourite surface to take reflection photos. Glass is a very useful surface if you want to get creative when taking photos.
Unlike water, most reflections taken on glass create effects that can make the image way more powerful. Take some of the images below, and see how you can see at the same time what’s behind the glass and the reflection. Cities have glass everywhere, and store windows are perfect for this purpose.
There’s a big misconception in reflection photography that the reflection needs to be perfect. I strongly disagree with it. A partial reflection, or a reflection that is distorted, can add way more to a photo than a perfect one. Glass, metal, any surface that has a slight reflective capability should be used for this kind of photography. And this leads perfectly into the next reflection photography tip

Create your own reflections
There are places where you might think it is not possible to take a reflection shot. Maybe because the water is moving, or because there is no water, mirrors, or anything to be used as a reflective surface.
Nowadays, almost everyone carries the perfect tool to create a reflection: your smartphone. Place your smartphone close to your camera lens, and enjoy creating reflections in unusual locations. You will make people go crazy trying to recreate your shot, and you will get a unique image.
Another way to create your own reflections is by bringing a bottle of water. This has had a lot of success on social media, as it makes for great short videos. However, it requires a bit of planning and using the right lenses.
But smartphones and water bottles are not the only way to create reflections. Watches, car windows, coins, glasses, your imagination and creativity are the limit here. If you are getting started in photography, it’s common to try to recreate what you see others taking.
It’s natural, but at some point, you’ll want to start getting your own shots, taking things differently than what you’ve seen before. Reflections are a great way to get started.
Technique and gear reflection photography tips
For the final part of this reflection photography tips guide, it’s time to talk about a topic I hate and a topic I love. Technique (love), and gear (hate). Gear is sometimes used as an excuse for taking bad photos, and the solution (usually) is better technique. Let’s talk about them!
Use a polariser
It’s one of the few cases where a gear recommendation actually makes sense. When someone wants to take their photography a bit further but does not have a huge budget, I strongly recommend getting a polariser. This little filter, most of the time easily attached to the camera, takes photography to a new level.
Polarisers are used to remove reflections, darken skies, or manage the annoying effect the sun creates when reflecting on water surfaces (glares), and can be used (or avoided) when taking reflection shots to either make reflections stronger or help see through the surfaces (either if it is water, glass, or any other surface). As always, the best way to understand how to use a polariser is by playing and experimenting.
A polariser is a tool, though. Getting it doesn’t mean you’ll take better photos, but that you will have more options when taking them.
Bonus tip: Some people forget they have a polariser in their lens. This can lead to taking all photos with it, which might end up in photos that are not exactly what you are after.
Get as low as possible
Taking good photos usually requires getting into weird positions. And by weird, I mean really weird. If you are trying to get a reflection on a water puddle, get as close as possible to the water. Why is it relevant? Well, because this can help get a perfectly symmetrical image, if that’s what you are looking for.
As with any of the reflection photography tips, use them only when it matters. If you are in front of a big lake, getting low might not be that relevant.
However, sometimes one just wants the reflection to be part of the image, but not the most important aspect of it. In those cases, taking some distance can be very helpful, as the reflection will be noticeable, but not take all the attention.
Adjust your position and try different views. Do not stick to the first image you see. It might be the perfect one, but from my experience, looking at the scene from a different perspective helps to discover other angles.
Get closer
This tip is quite linked with the previous one, but more applicable for street and travel photography. While getting low is important once you’ve identified the reflection, sometimes you need to move to find it.
Take the image below. It’s a reflection, but one that can only be seen at a very specific angle and position. If I had not checked possible angles and got closer to the table, I would not have been able to take this photo.
It’s listed as one of the ten reflection photography tips, but it can be applied to any other photography discipline. Move, and you’ll find different photo opportunities.

Play with exposure times
Let’s be honest. It’s not that easy to get perfect reflection conditions, especially if you are working with nature. I mentioned wind many times, but a boat or a bird can have a similar effect on a reflection. Here’s when long exposure plays a role.
I used to love long exposure. Nowadays, I try to avoid it, as it usually requires sturdy tripods. However, if you want perfect (or different) reflections, long exposure is something you should try. Don’t expect perfect reflections, but a different type of reflection. You can get moving clouds in the water, a trail of a boat…
Even in cities, it’s possible to use tripods and long exposure for reflections. They come in handy if you want to remove people from a scene.
Frame the reflection
This is the last of the reflection photography tips, but it might be the most important one. I already mentioned that a good reflection does not always lead to a good photo.
If you want to do a quick test, search for reflection on Instagram, discard the first posts, and you’ll see amazing skies and reflections, but they are terribly framed.
Composition is everything in photography. Reflections are not an exception. Here are a few things to keep in mind that can help you improve your reflection photos:
- Add foreground. The reflection looks nice, but if you add some foreground, it will add depth to your photo and create a more complete image.
- Don’t overuse the symmetry. Perfectly symmetrical photos are nice, but think of other ways to compose the image. Giving more space to the sky than the ground usually works well.
- Flip the image. This is a very useful trick in photography that works well for perfect reflections. Make the viewer guess what’s real and what’s not.
- Take straight photos. Getting low sometimes means taking crooked photos, and this is something you should avoid. Unless it’s for composition reasons, don’t take crooked photos.

No matter when or where, it is always a good idea to get out and go get some nice reflection images. Over the years, I have found this type of photography to be one of the most rewarding and fun to do. Even when I am just touristing or visiting a new place, I try to get different images by looking for reflections.
Hope you enjoyed this reflection photography tips guide. If you want to see more of my work, sometimes with reflections, or any other of my trips, visit my Instagram!
Drone photography with a DJI Mini 2: best tips to take amazing photos
10 reasons to stop posting on Instagram as a creator
Solo travel photography: 11 tips you have to know
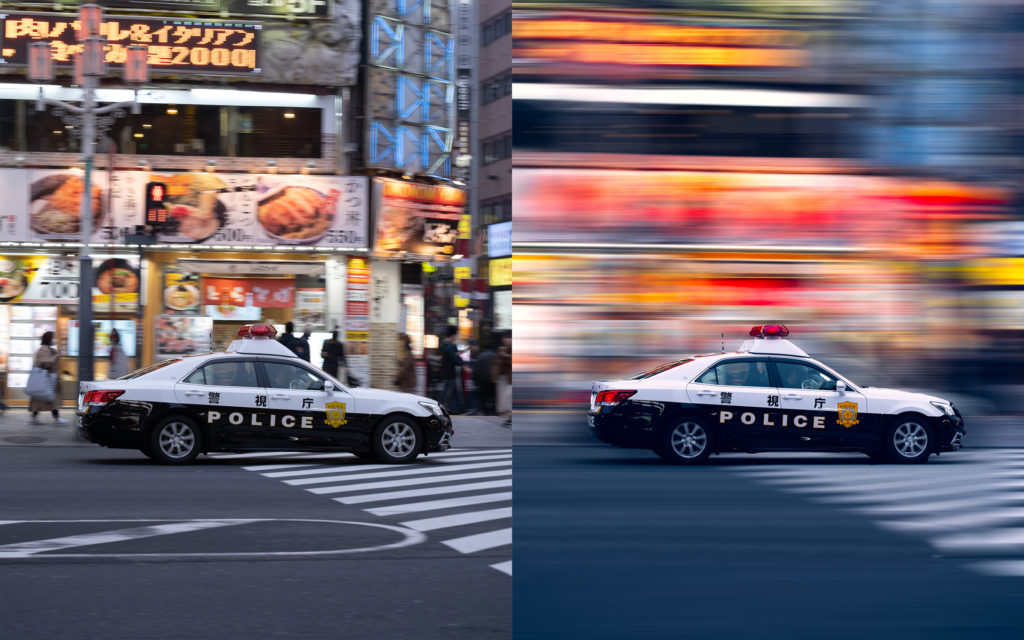
Panning photography: how to take it and how to fake it (Photoshop)
10 differences between camera and smartphone photography: an ultimate list